Poses
99 asanas in photographs, with Sanskrit and English names. For deeper study, get your hands on B.K.S. Iyengar's Light on Yoga.
Listen to the cues
10 poses come with spoken cues: open one and press play while you look at the pose. Look for the ♫ Audio cues tag in the gallery.
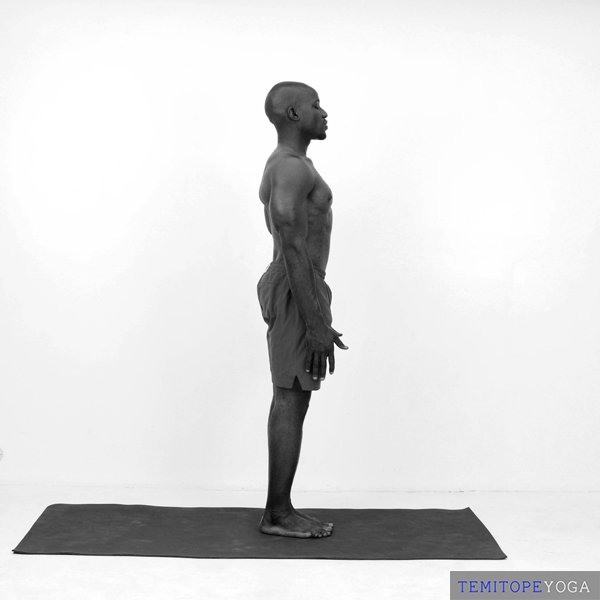 Mountain PoseTadasana
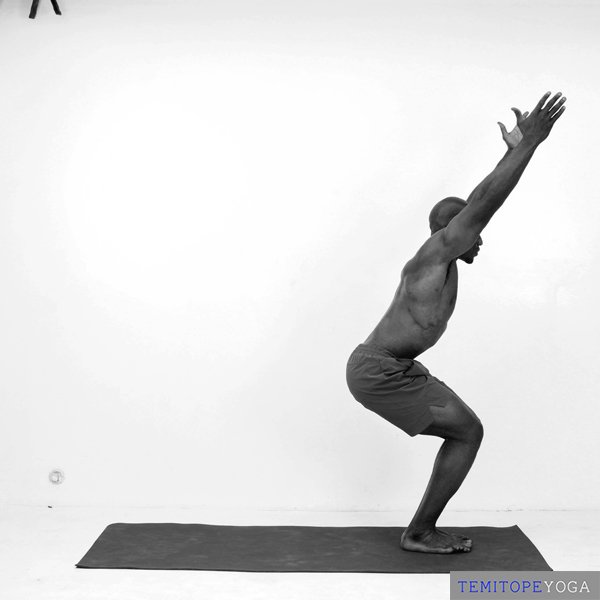 Chair PoseUtkatasana
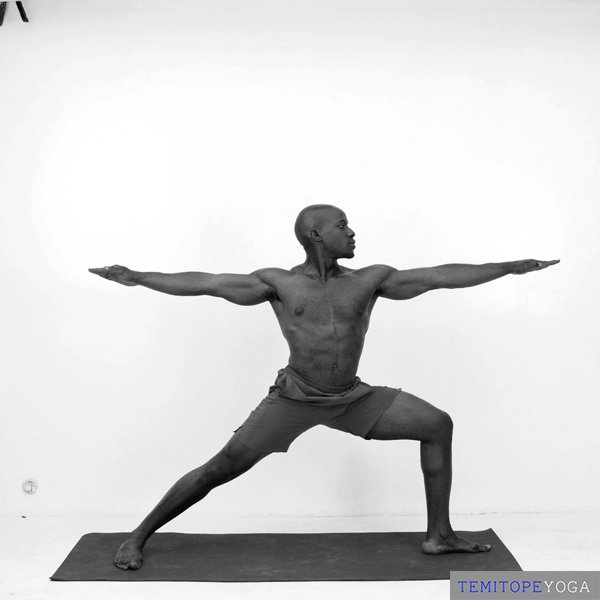 Warrior IIVirabhadrasana II
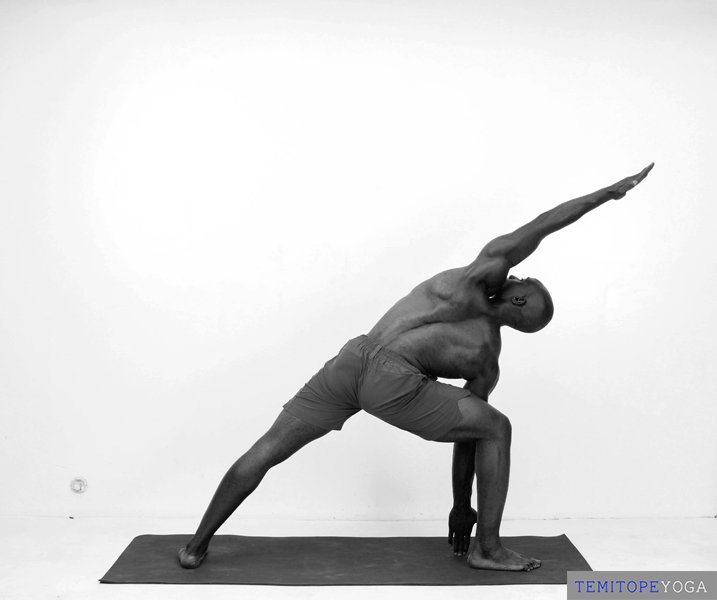 Extended Side Angle PoseUtthita Parsvakonasana
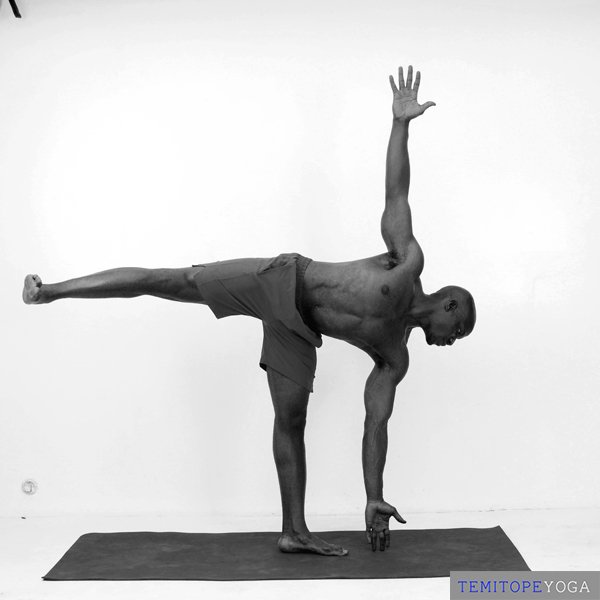 Half Moon PoseArdha Chandrasana
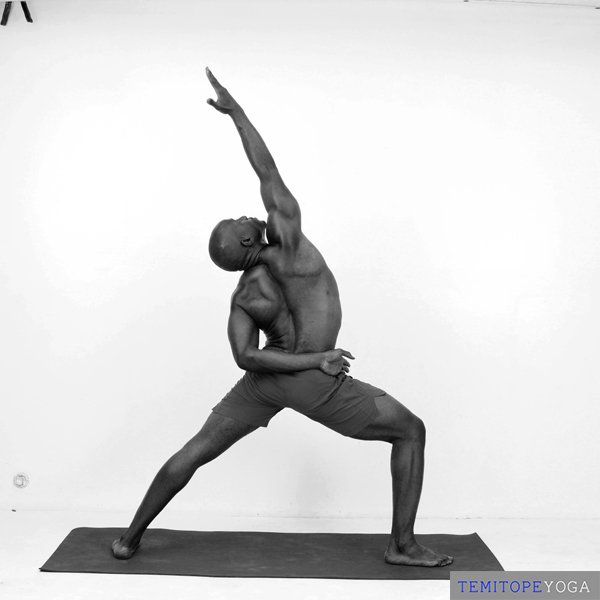 Reverse WarriorViparita Virabhadrasana
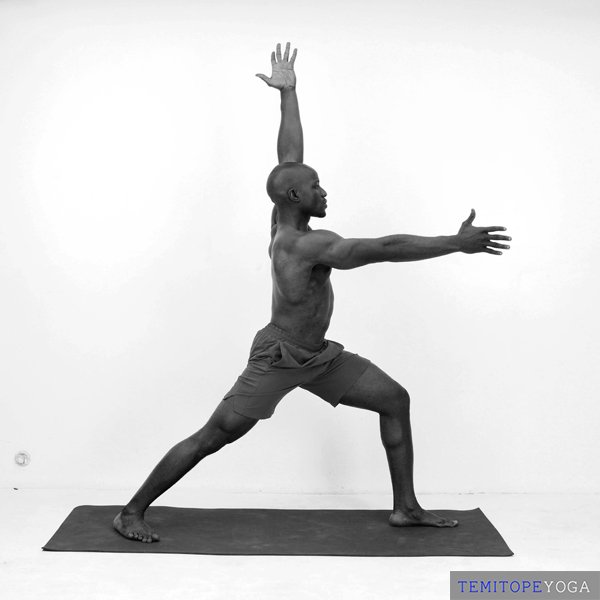 Warrior IVirabhadrasana I
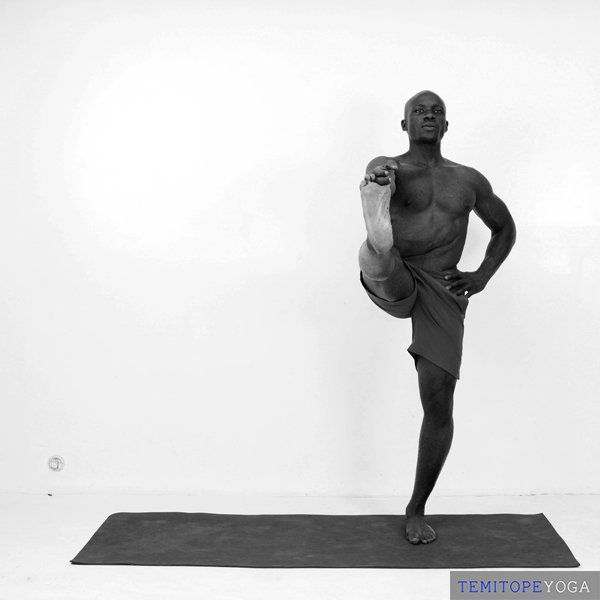 Extended Hand-to-Big-Toe PoseUtthita Hasta Padangusthasana
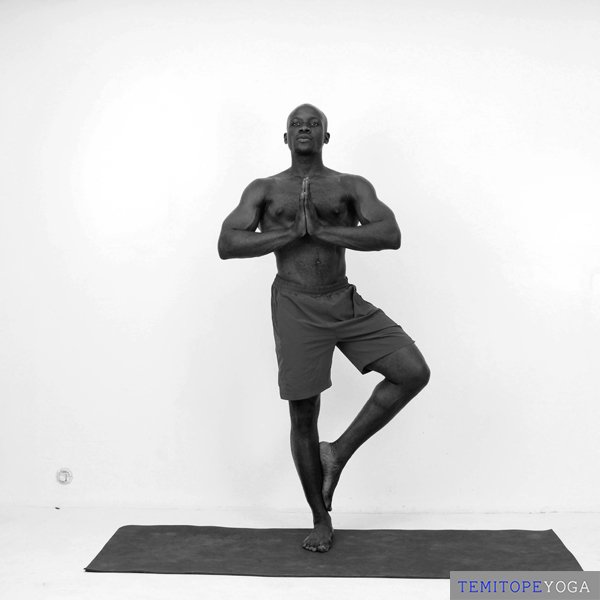 Tree PoseVrksasana
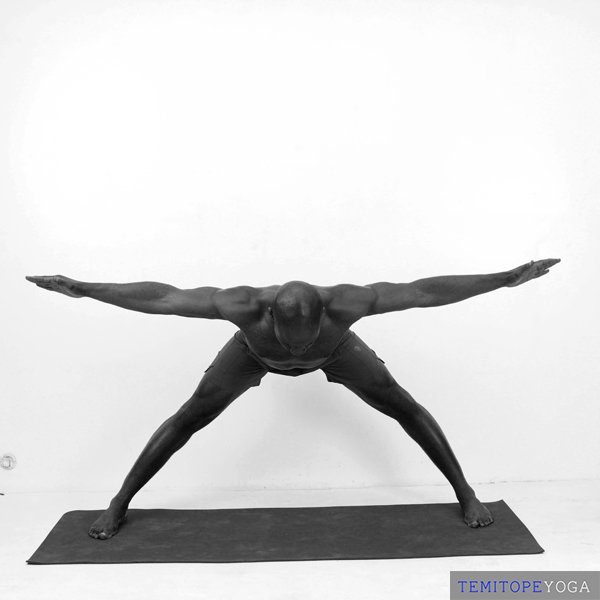 Wide-Legged Forward FoldPrasarita Padottanasana
-
♫ Audio cues
TadasanaMountain Pose -
♫ Audio cues
UtkatasanaChair Pose -
 ♫ Audio cues
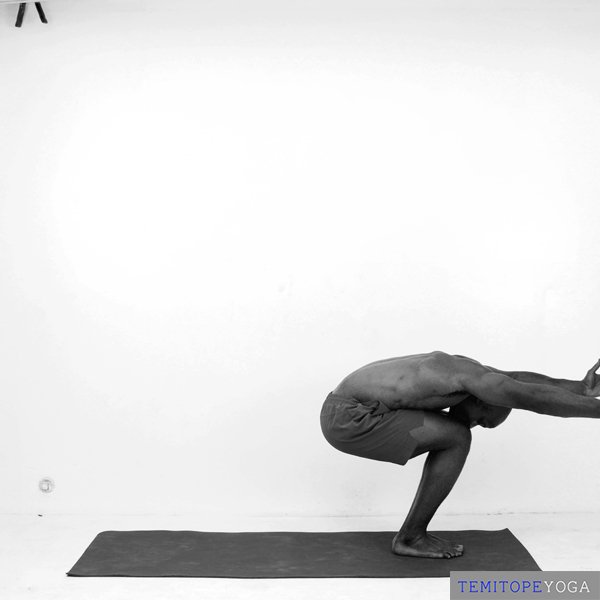
Utkatasana (prep)Chair Pose, preparation -
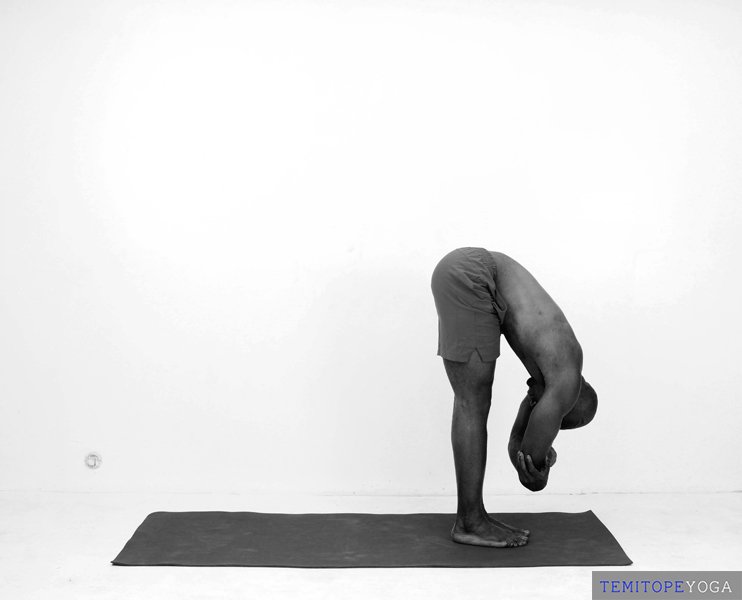
UttanasanaStanding Forward Fold -
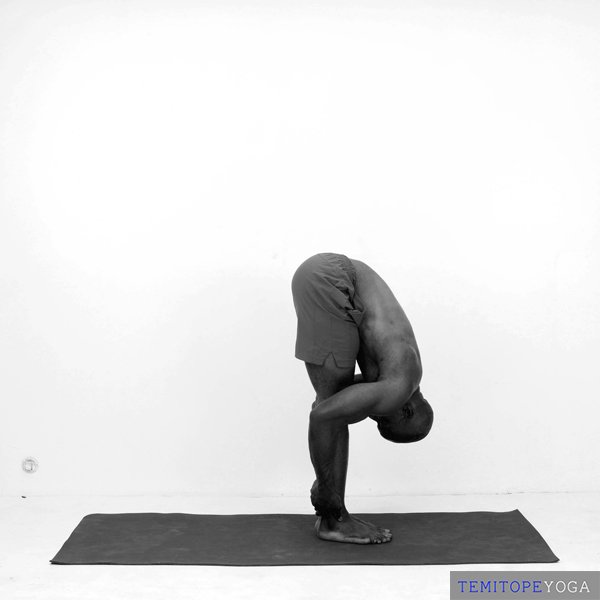
UttanasanaStanding Forward Fold -
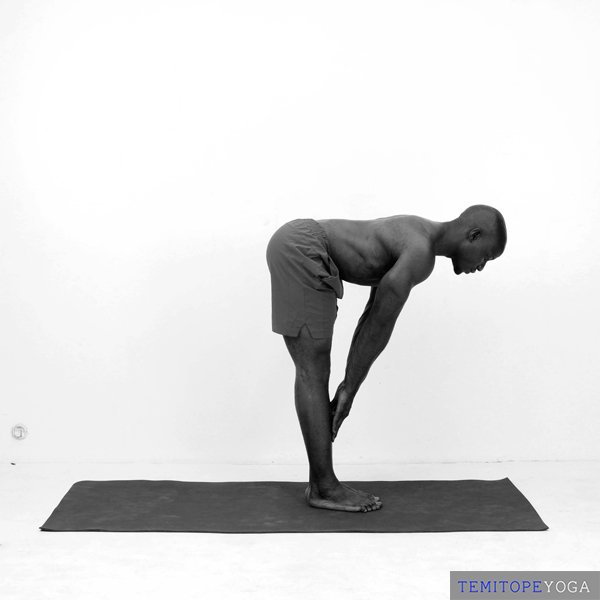
Ardha UttanasanaHalf Standing Forward Fold -
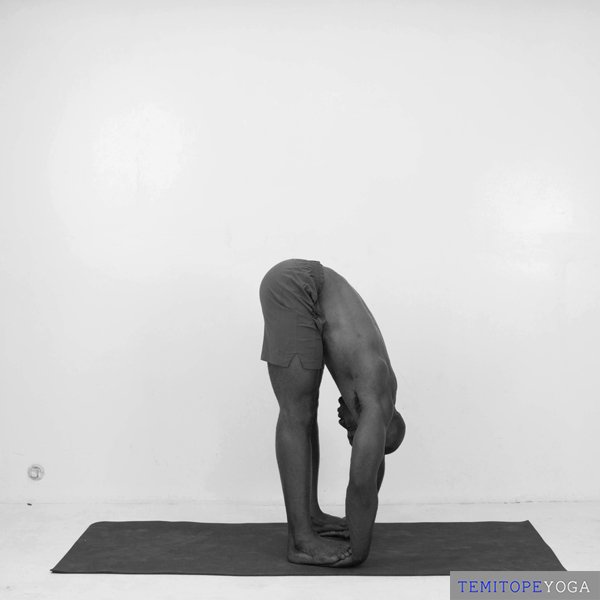
PadahastasanaHands Under Feet Pose -
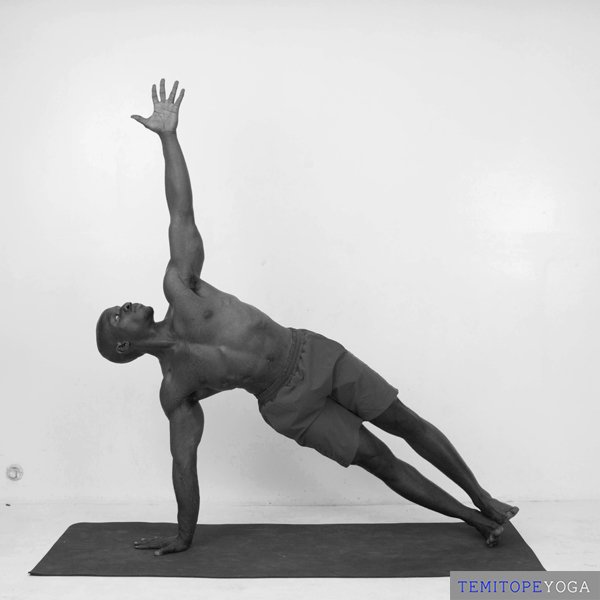
VasisthasanaSide Plank -
♫ Audio cues
Virabhadrasana IIWarrior II -
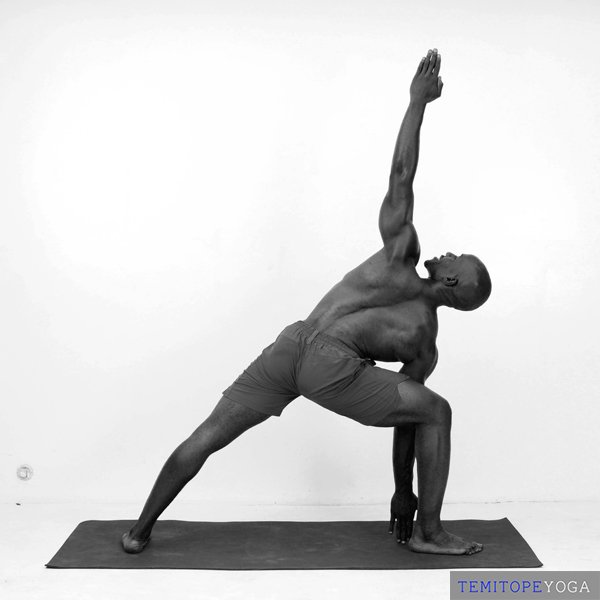
ParsvakonasanaSide Angle Pose -
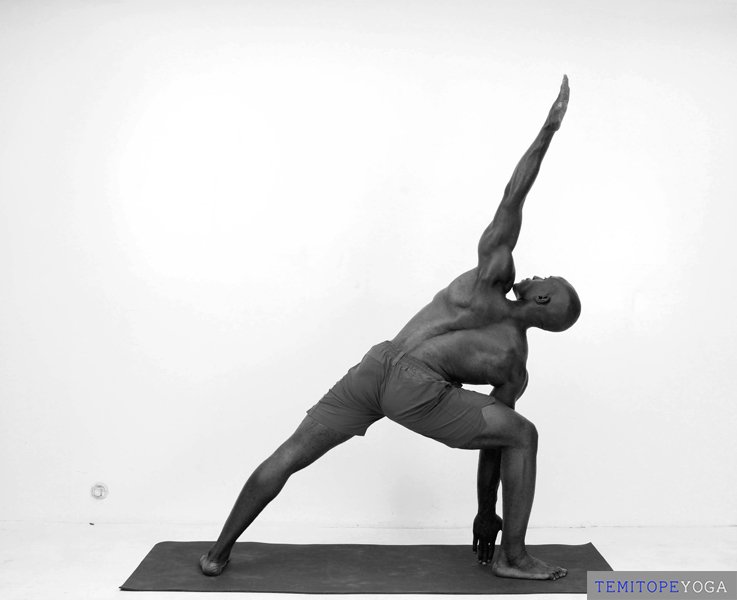
ParsvakonasanaSide Angle Pose -
♫ Audio cues
Utthita Parsvakonasana (variation)Extended Side Angle Pose, variation -
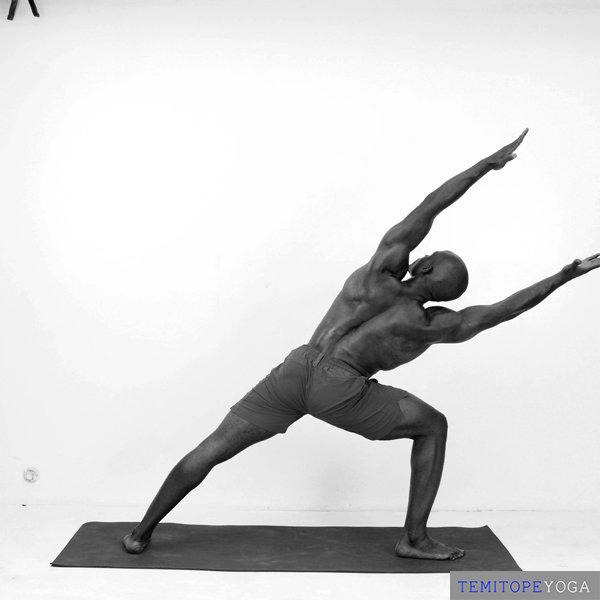 ♫ Audio cues
Utthita ParsvakonasanaExtended Side Angle Pose -
♫ Audio cues
Ardha ChandrasanaHalf Moon Pose -
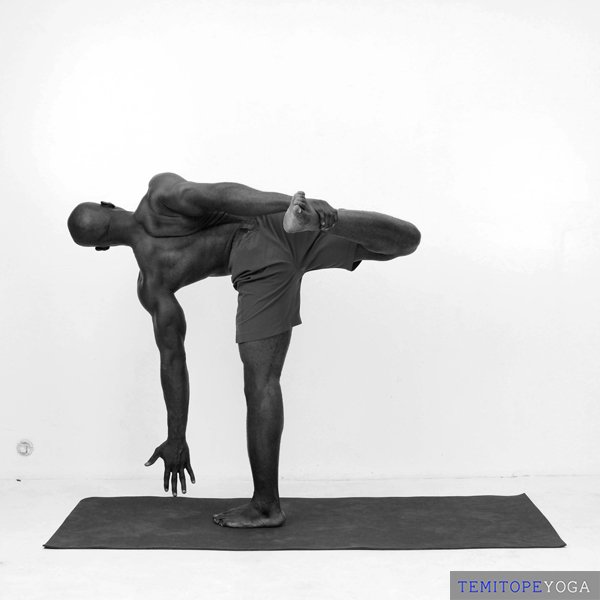 ♫ Audio cues
Ardha Chandrasana (variation)Half Moon Pose, variation -
♫ Audio cues
Viparita VirabhadrasanaReverse Warrior -
♫ Audio cues
Virabhadrasana IWarrior I -
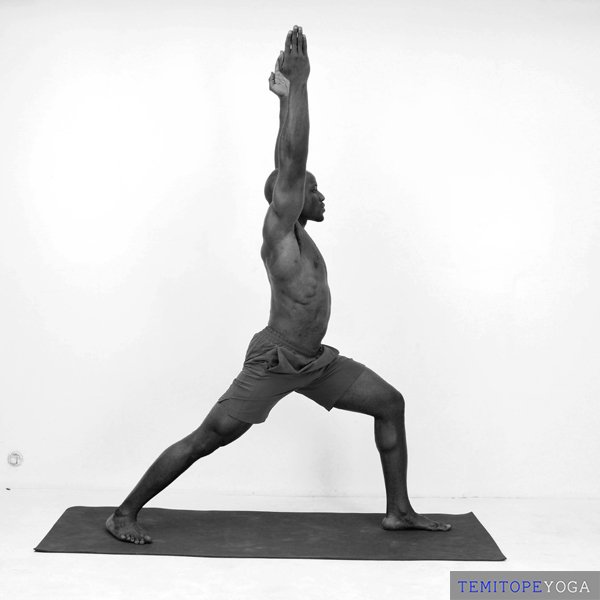 ♫ Audio cues
Virabhadrasana IWarrior I -
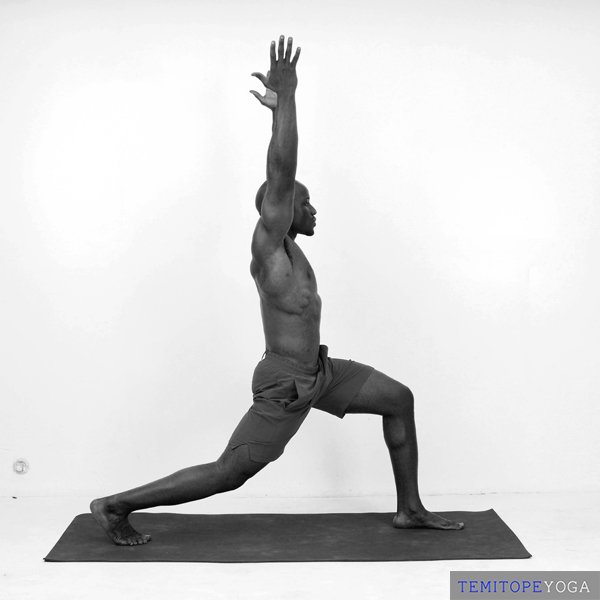
Anjaneyasana (variation)Low Lunge, variation -
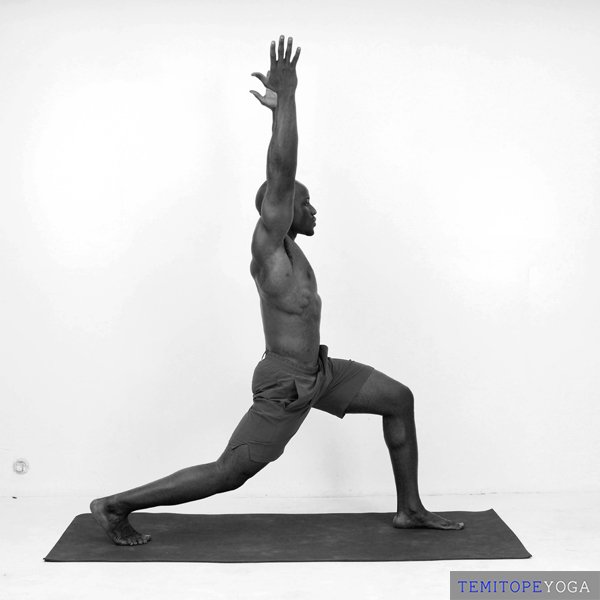
Anjaneyasana (variation)Low Lunge, variation -
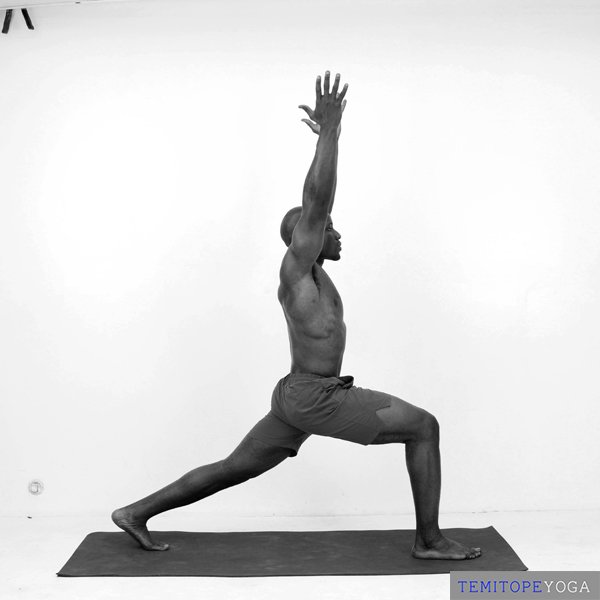
AnjaneyasanaLow Lunge -
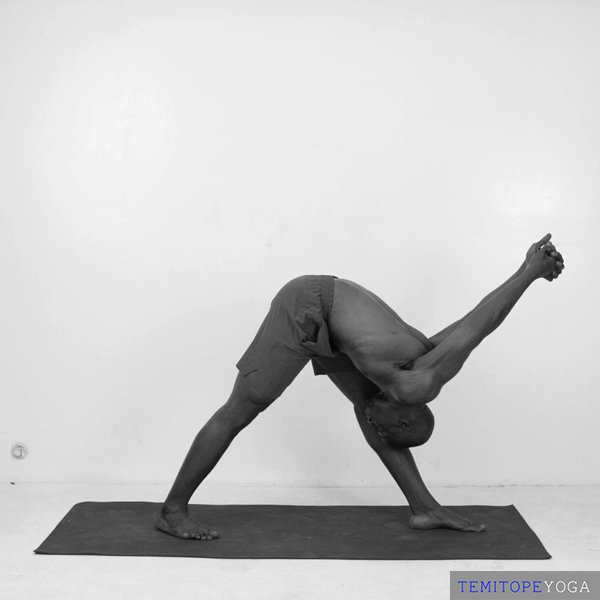
ParsvottanasanaPyramid Pose -
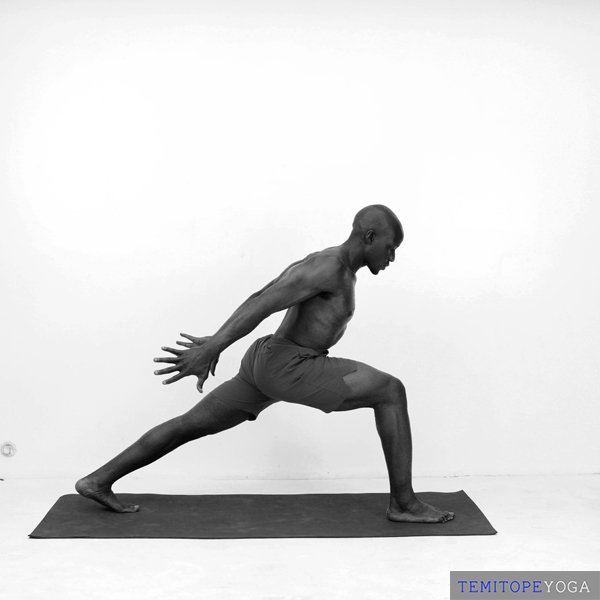
Anjaneyasana (variation)Low Lunge, variation -
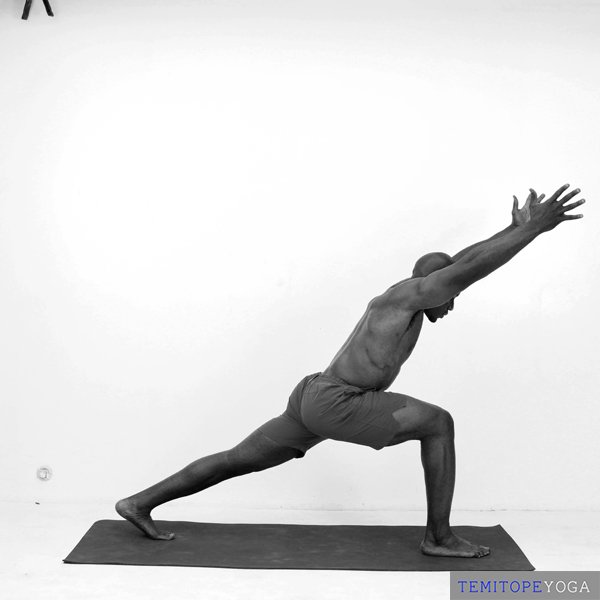
Virabhadrasana III (prep)Warrior III, preparation -
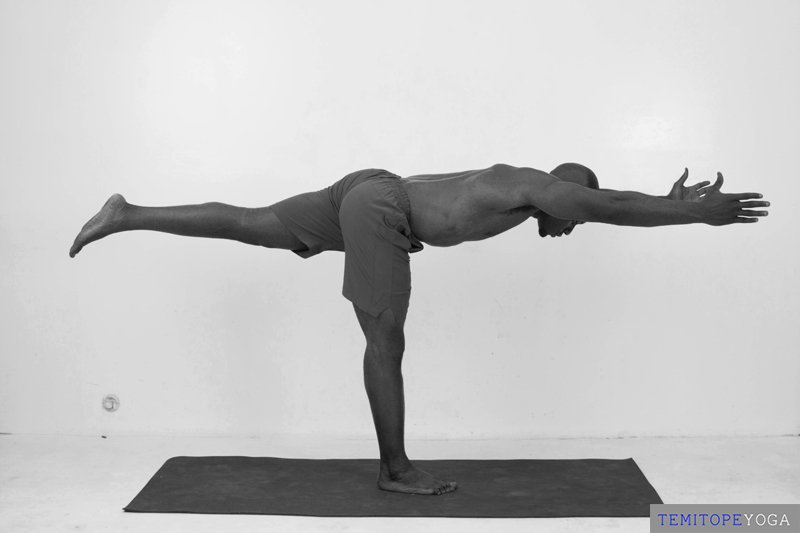
Virabhadrasana IIIWarrior III -
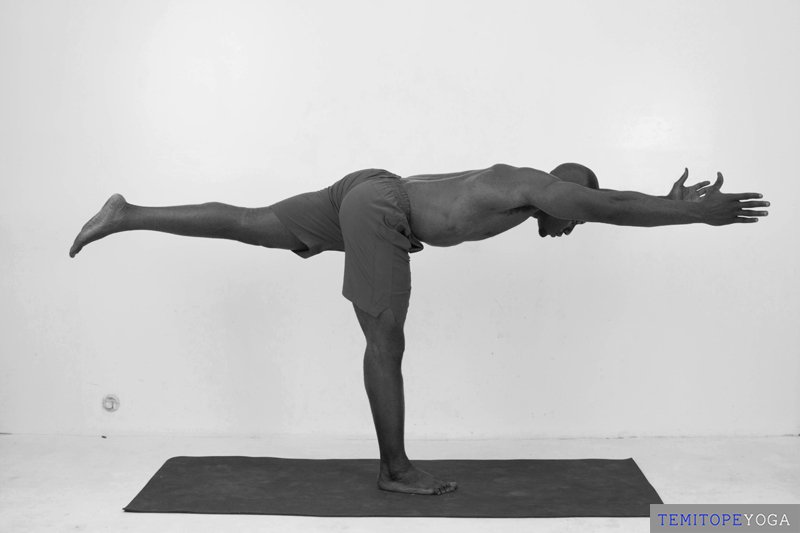
Virabhadrasana IIIWarrior III -
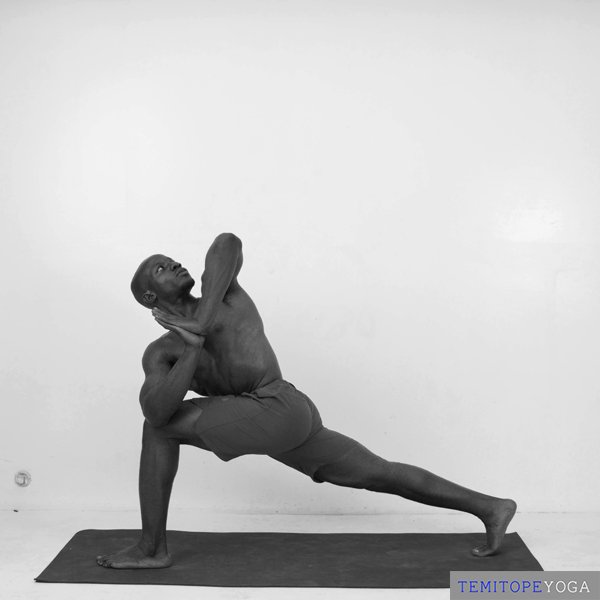
Parivrtta ParsvakonasanaRevolved Side Angle Pose -
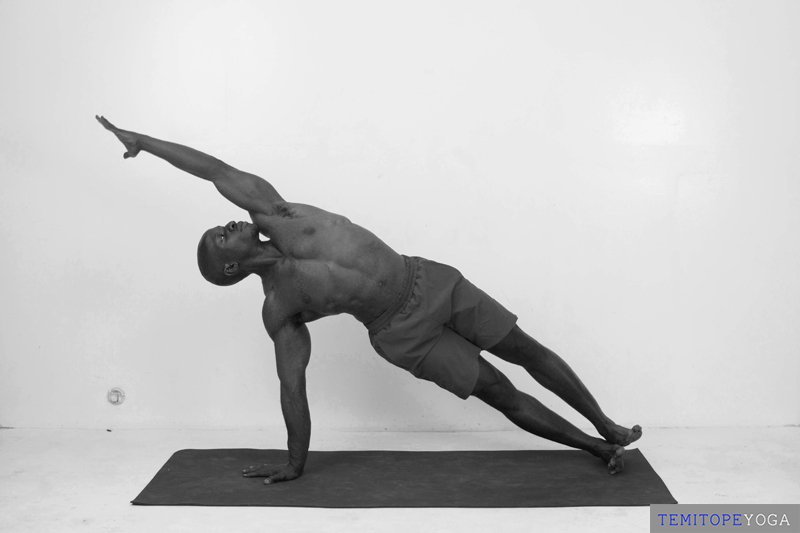
Utthita VasisthasanaExtended Side Plank -
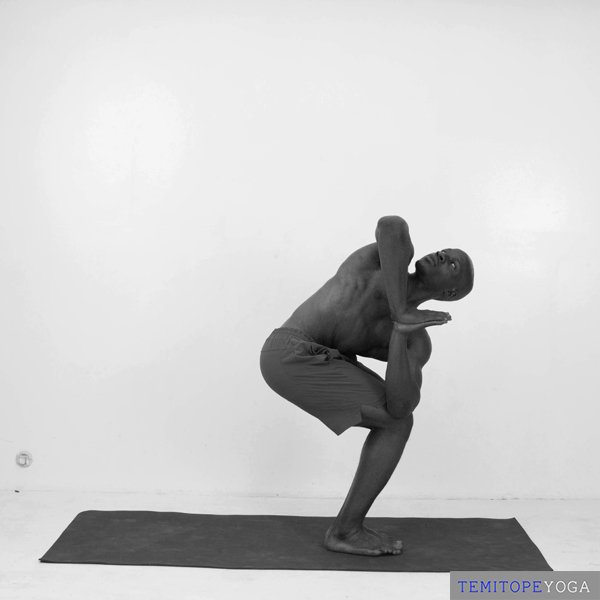
Parivrtta UtkatasanaRevolved Chair Pose -
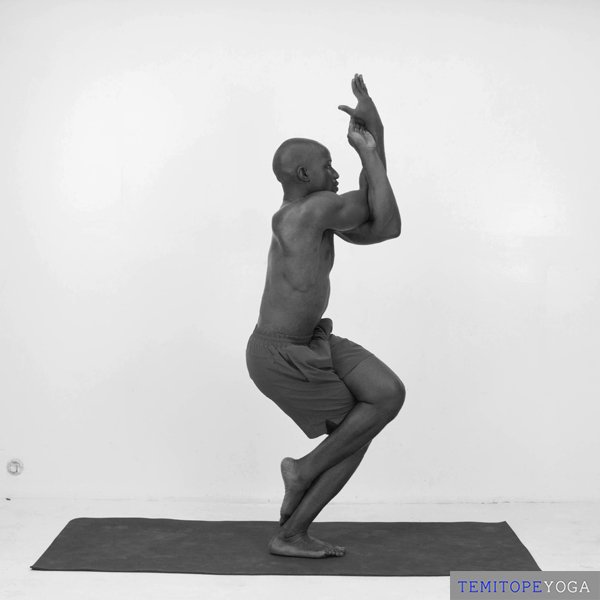
GarudasanaEagle Pose -
♫ Audio cues
Utthita Hasta PadangusthasanaExtended Hand-to-Big-Toe Pose -
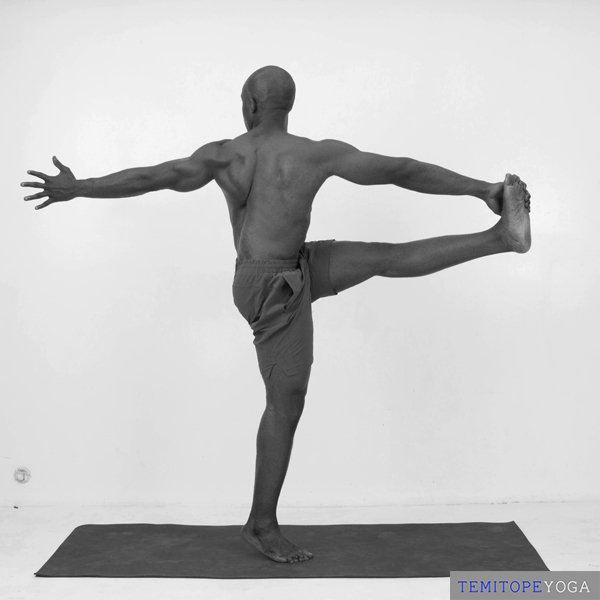 ♫ Audio cues
Utthita Hasta Padangusthasana (variation)Extended Hand-to-Big-Toe Pose, variation -
♫ Audio cues
VrksasanaTree Pose -
♫ Audio cues
Prasarita Padottanasana (prep)Wide-Legged Forward Fold, preparation -
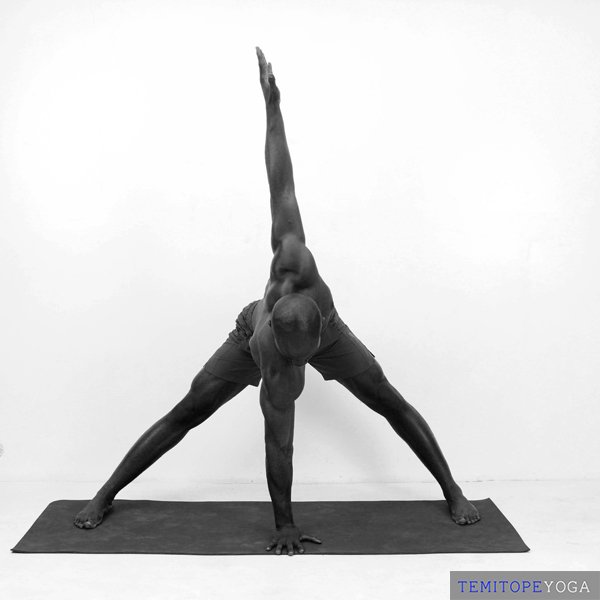 ♫ Audio cues
Prasarita Padottanasana (variation)Wide-Legged Forward Fold, variation -
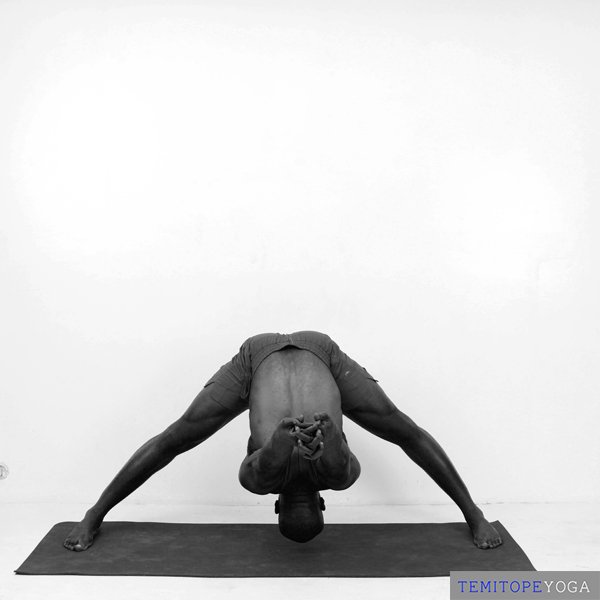 ♫ Audio cues
Prasarita Padottanasana (variation)Wide-Legged Forward Fold, variation -
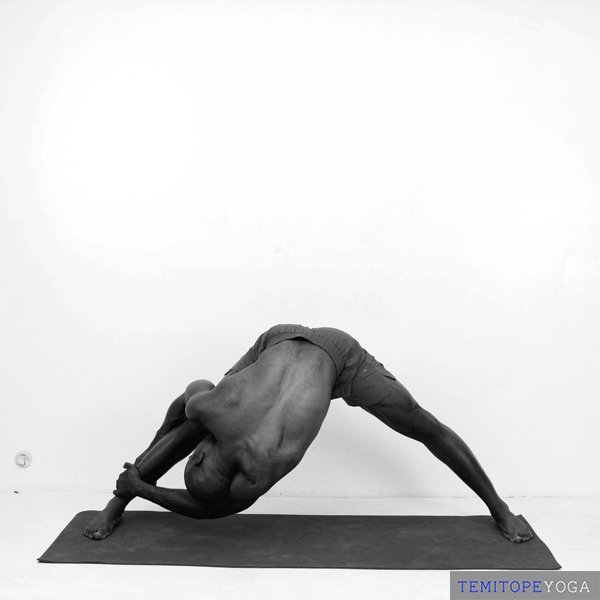 ♫ Audio cues
Prasarita Padottanasana (variation)Wide-Legged Forward Fold, variation -
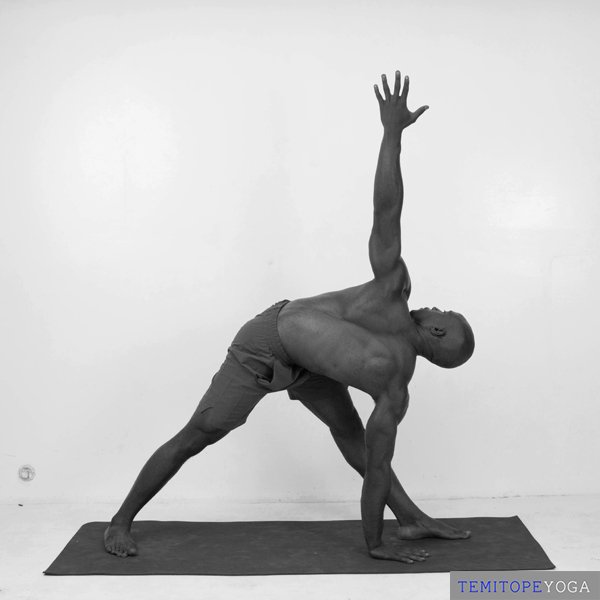
Parivrtta TrikonasanaRevolved Triangle Pose -
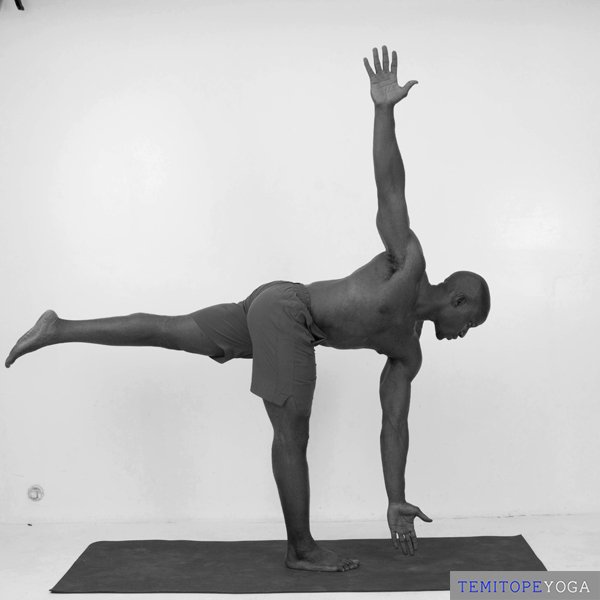
Parivrtta Ardha ChandrasanaRevolved Half Moon Pose -
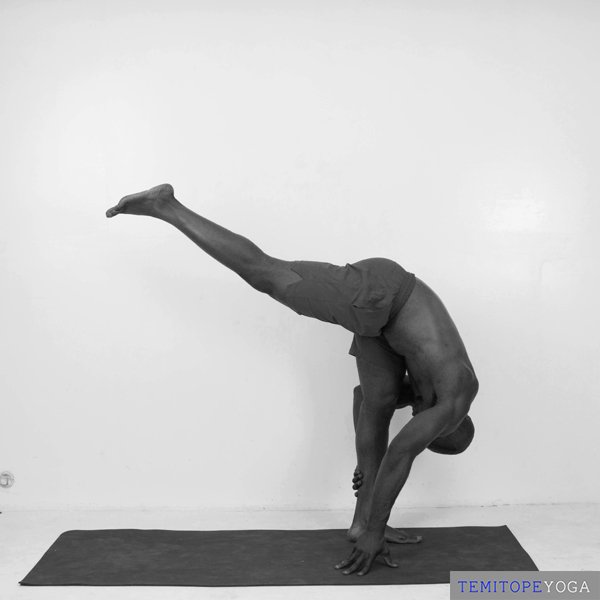
Urdhva Prasarita Eka PadasanaStanding Split -
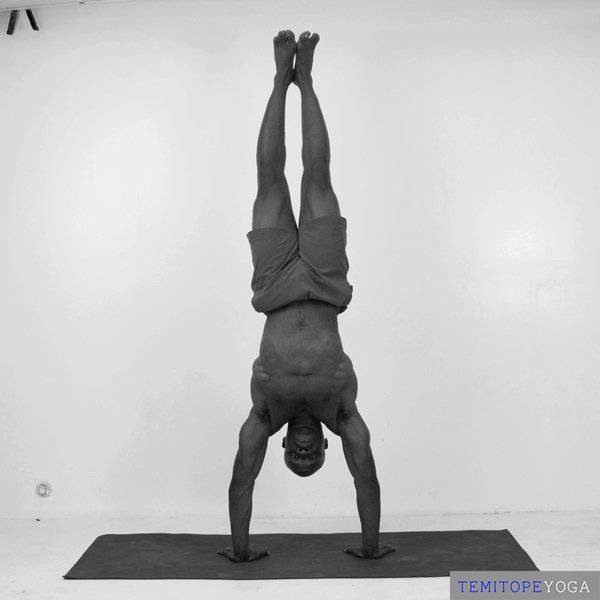
Adho Mukha VrksasanaHandstand -
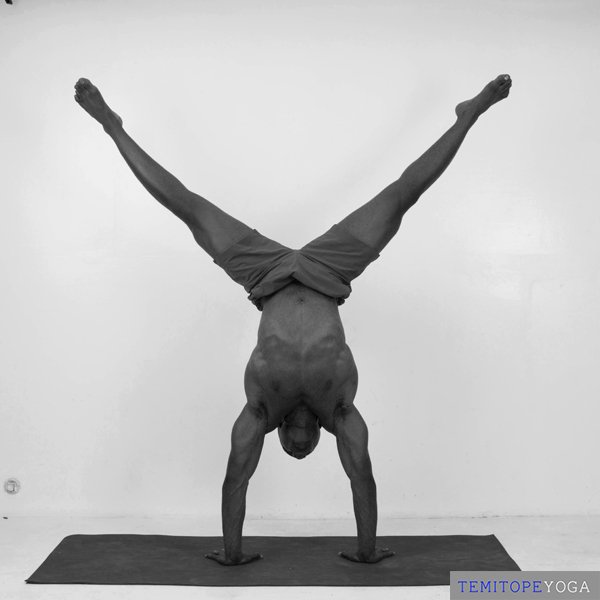
Adho Mukha VrksasanaHandstand -
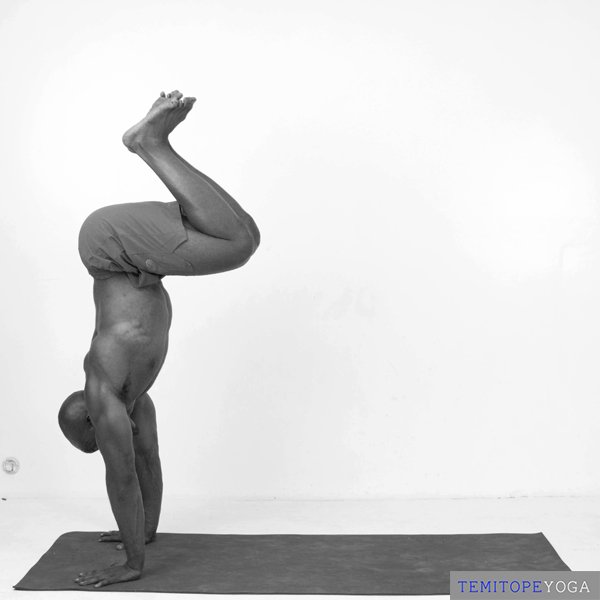
Adho Mukha VrksasanaHandstand -
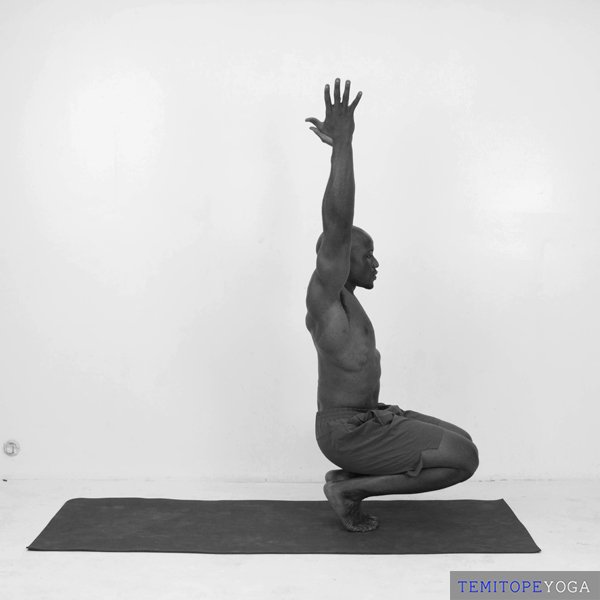
Malasana (variation)Garland Pose, variation -
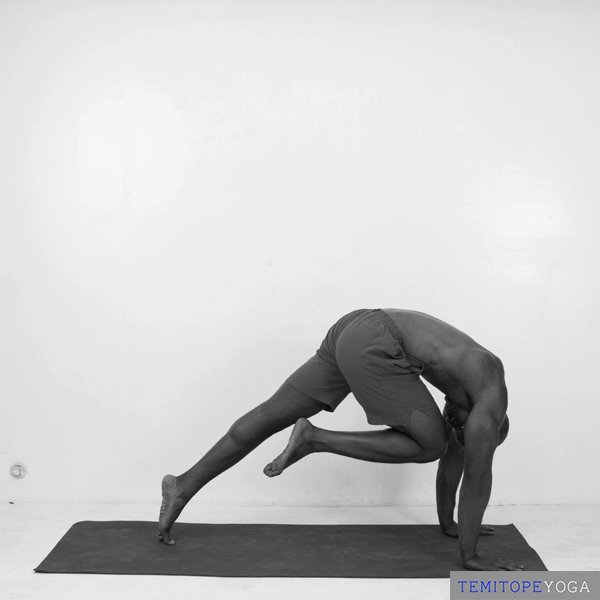
Lolasana (prep)Pendant Pose, preparation -
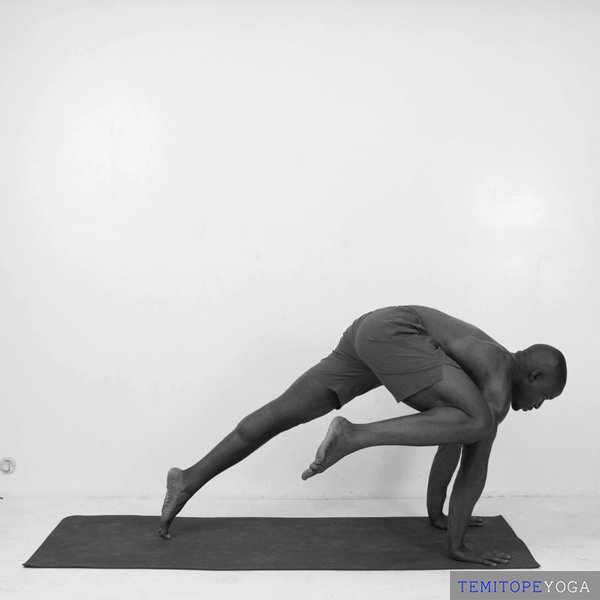
Eka Pada Koundinyasana (prep)One-Legged Sage Koundinya's Pose, preparation -
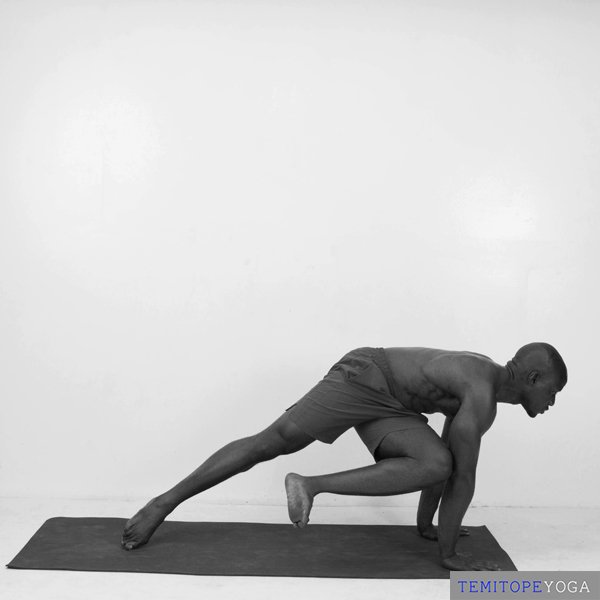
Eka Pada Koundinyasana (prep)One-Legged Sage Koundinya's Pose, preparation -
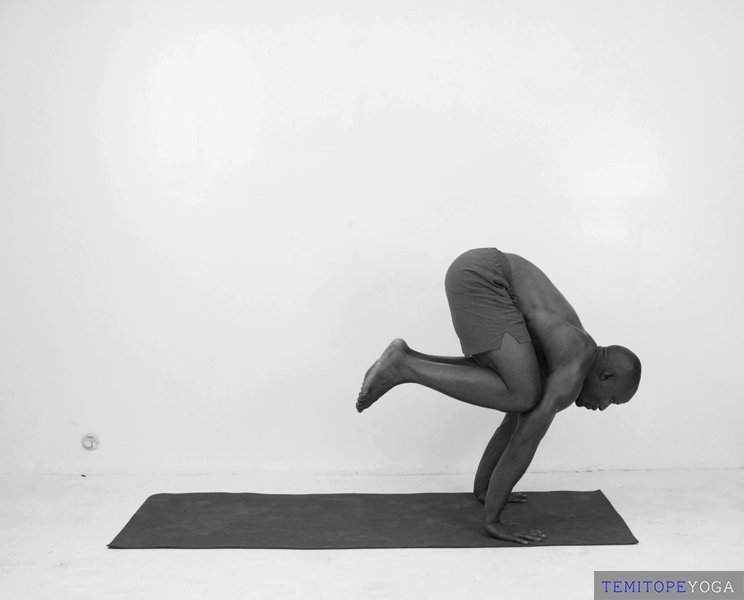
BakasanaCrow Pose -
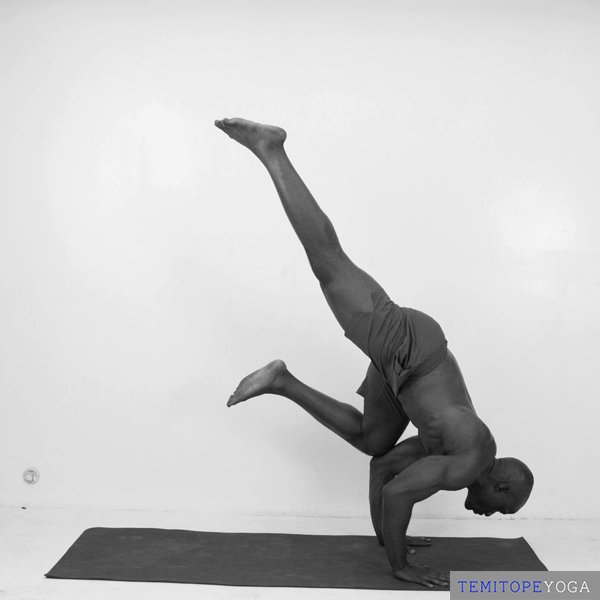
Urdhva Prasarita Eka PadasanaStanding Split -
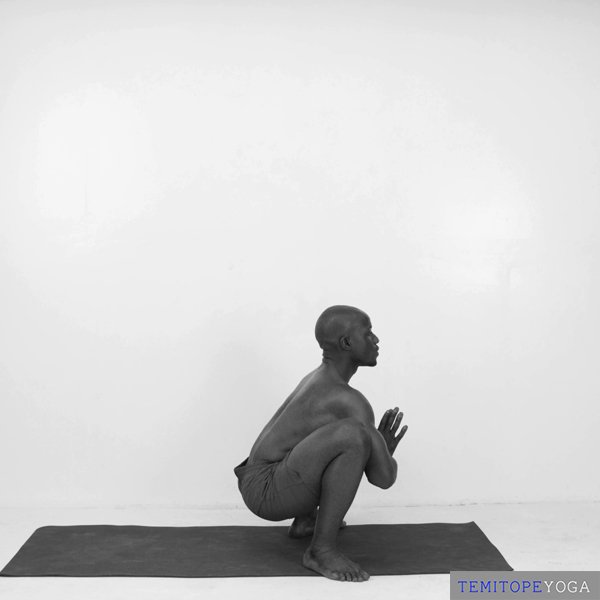
MalasanaGarland Pose (Yogi Squat) -
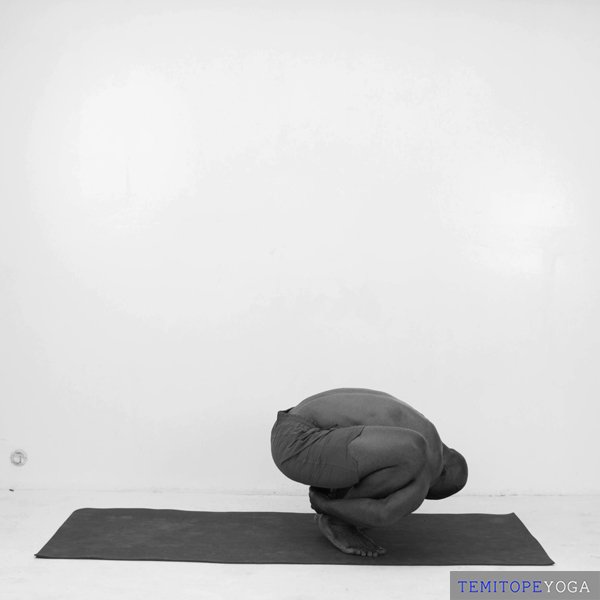
Malasana (variation)Garland Pose, variation -
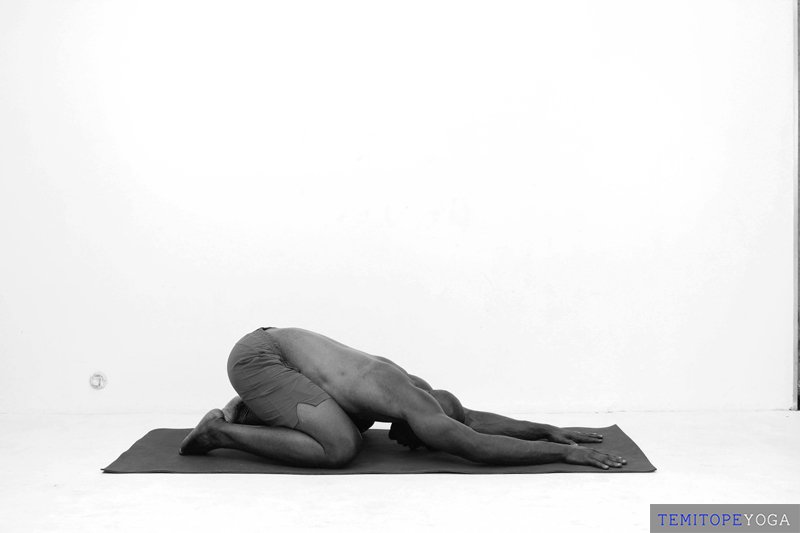
BalasanaChild's Pose -
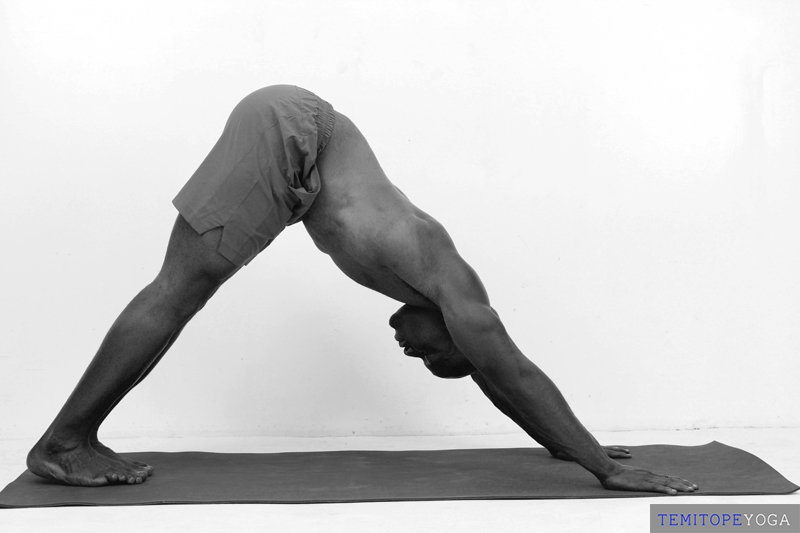
Adho Mukha SvanasanaDownward-Facing Dog -
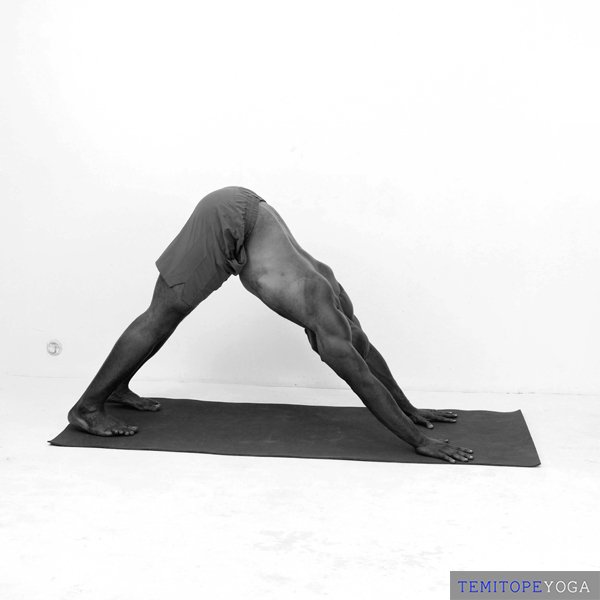
Adho Mukha SvanasanaDownward-Facing Dog -
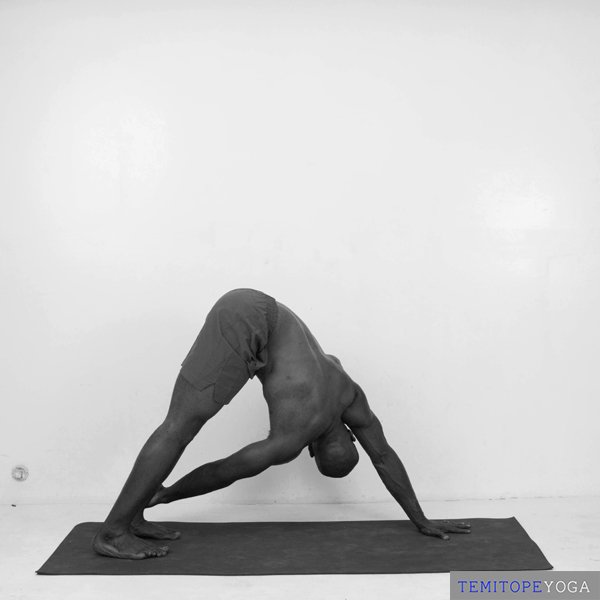
Parivrtta Adho Mukha SvanasanaRevolved Downward-Facing Dog -
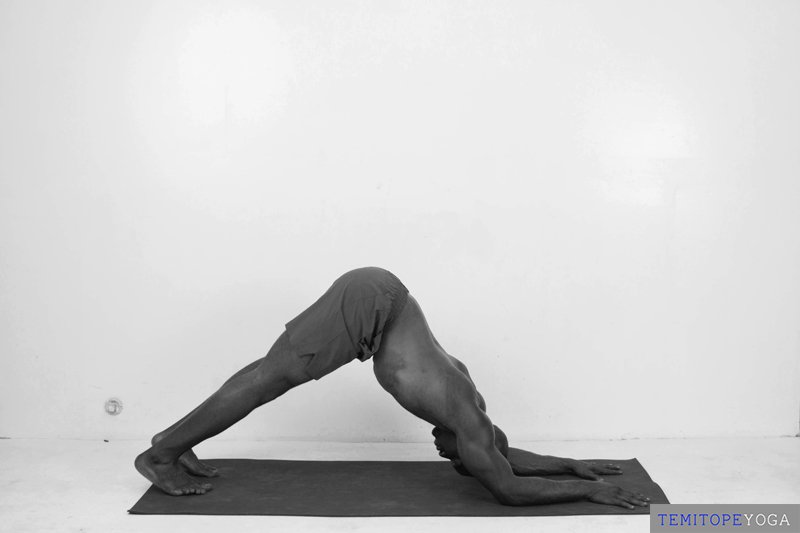
Pincha Mayurasana (prep)Forearm Stand, preparation -
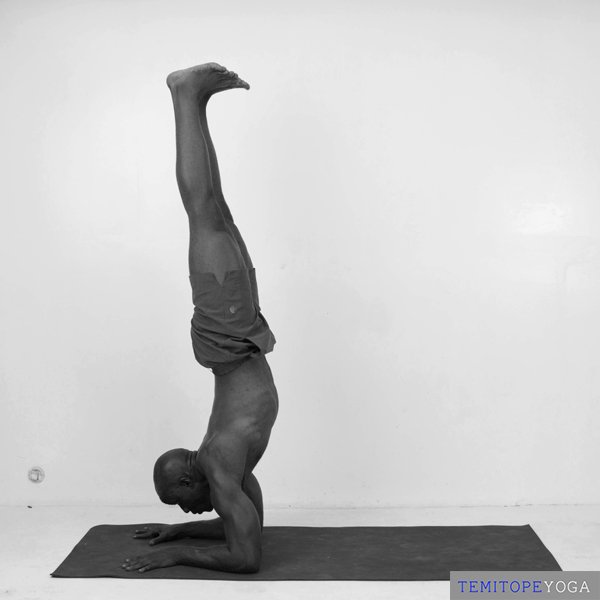
Pincha Mayurasana (variation)Forearm Stand, variation -
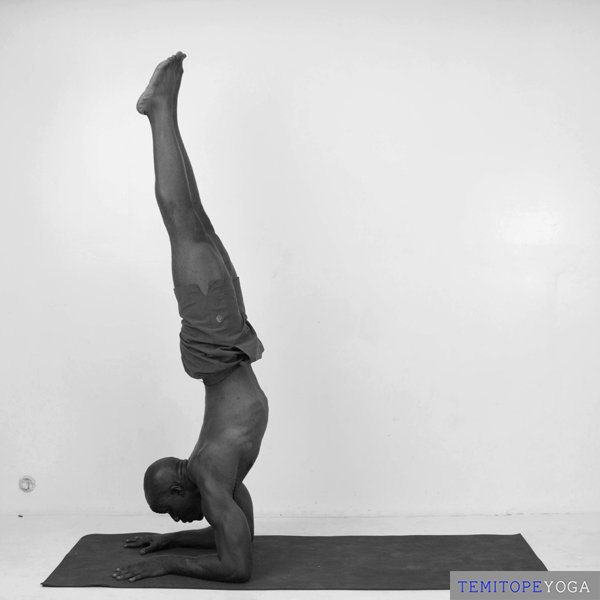
Pincha MayurasanaForearm Stand -
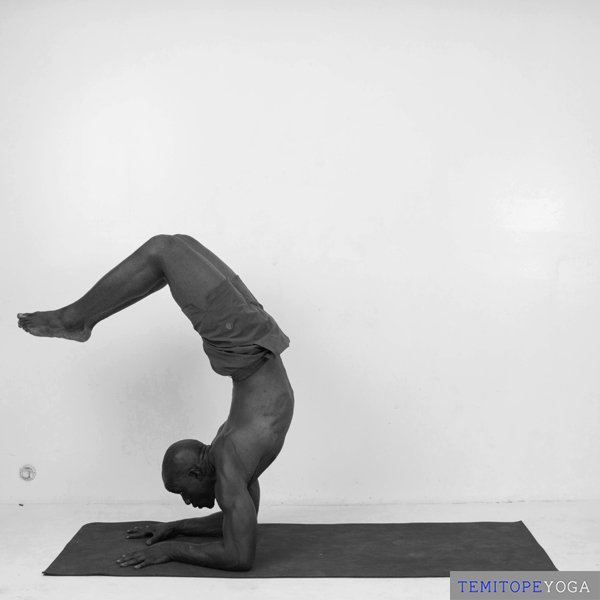
VrschikasanaScorpion Pose -
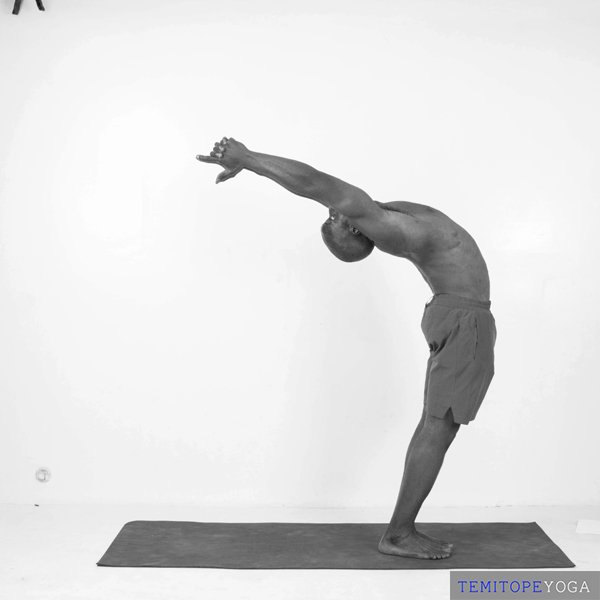
AnuvittasanaStanding Backbend -
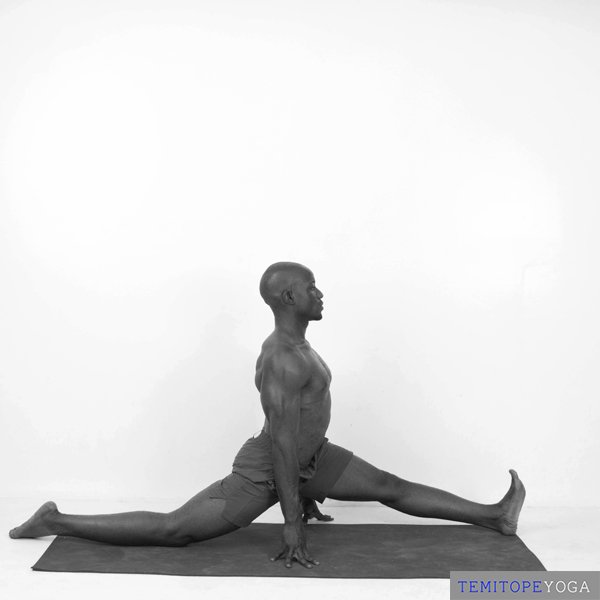
HanumanasanaFront Splits (Monkey Pose) -
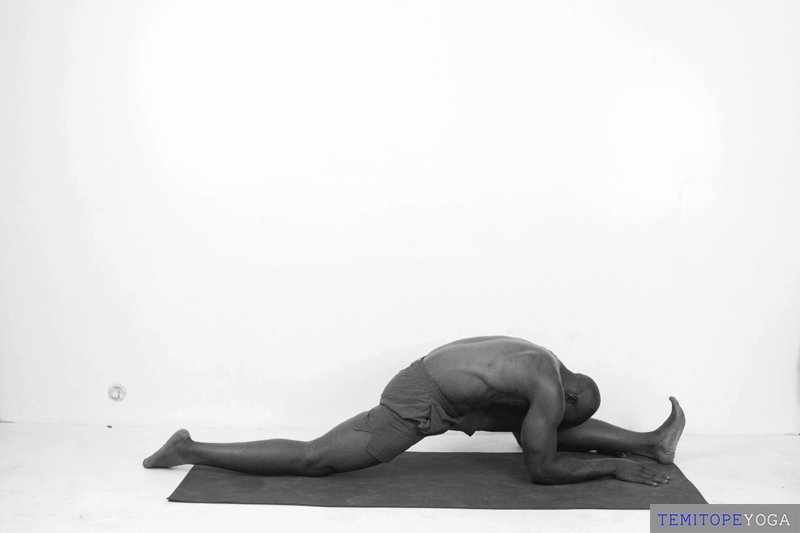
Hanumanasana (variation)Front Splits, variation -
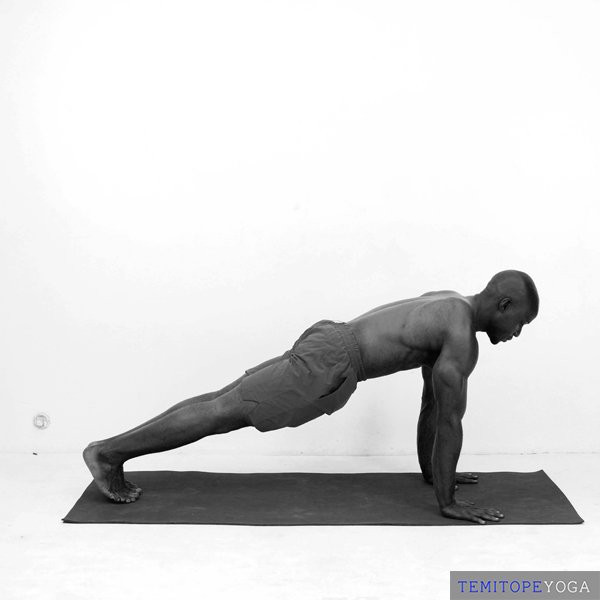
DandasanaStaff Pose -
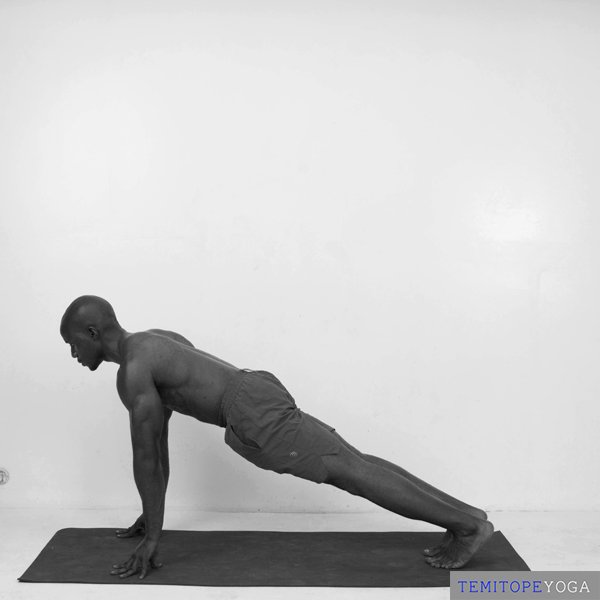
Dandasana (variation)Staff Pose, variation -
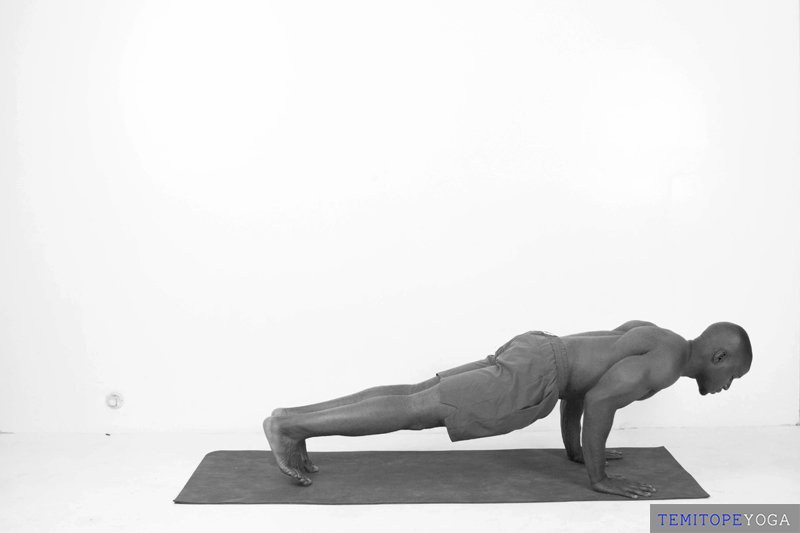
Chaturanga DandasanaFour-Limbed Staff Pose -
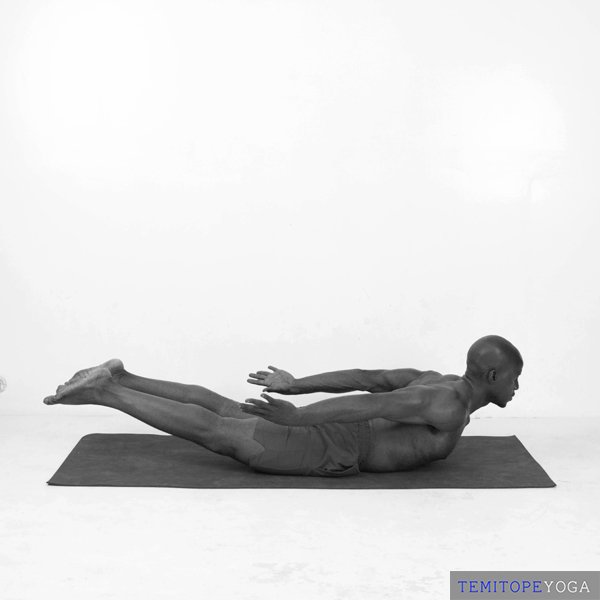
SalabhasanaLocust Pose -
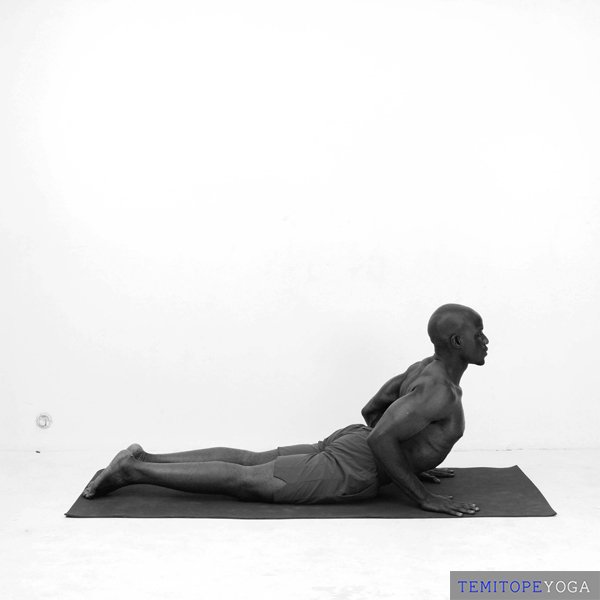
BhujangasanaCobra Pose -
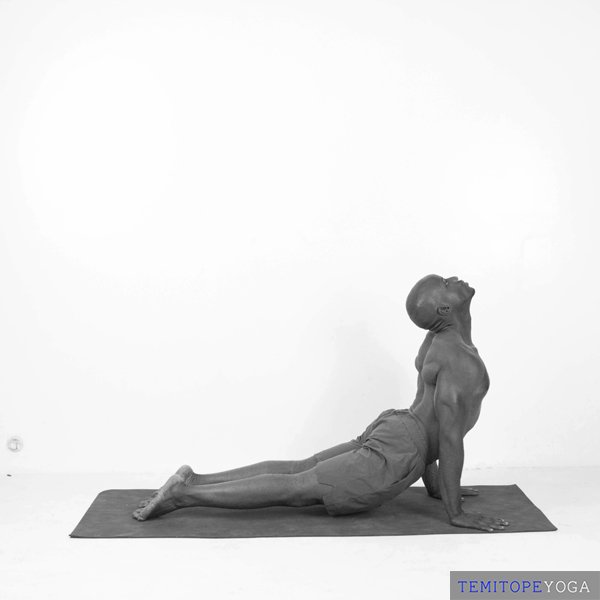
Urdhva Mukha SvanasanaUpward-Facing Dog -
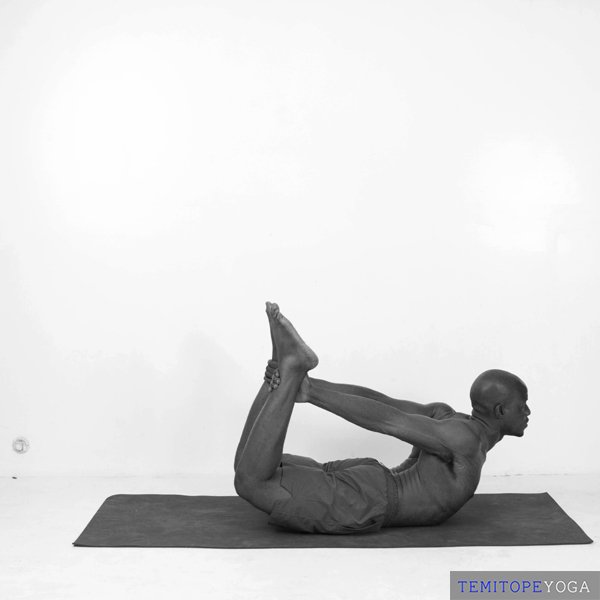
DhanurasanaBow Pose -
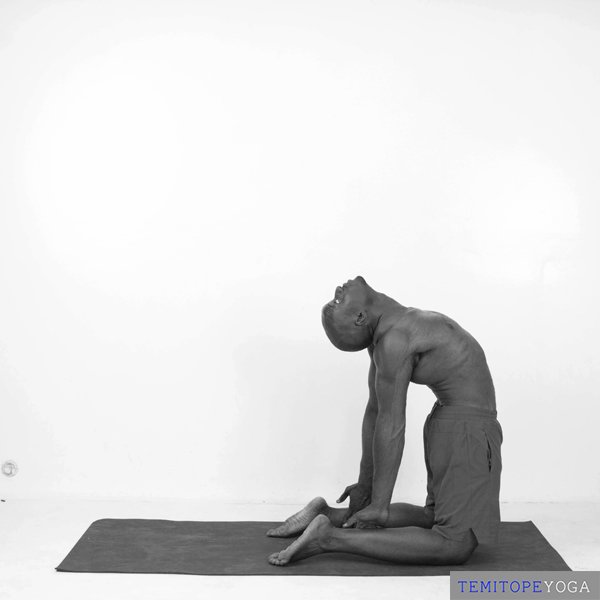
UstrasanaCamel Pose -
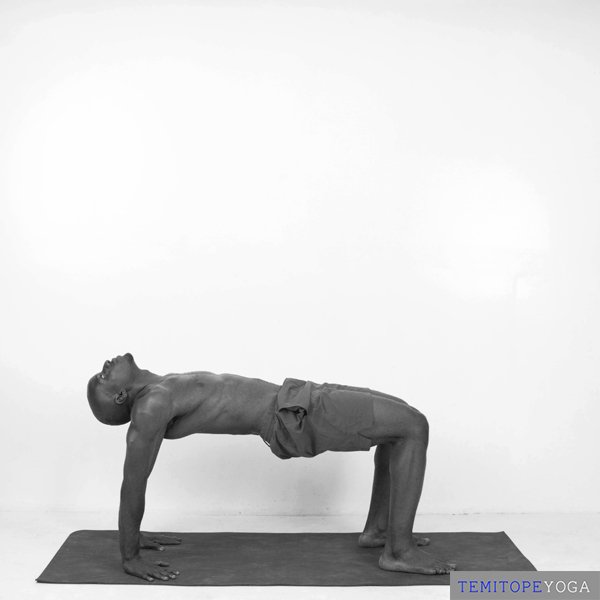
Purvottanasana (variation)Upward Plank, variation -
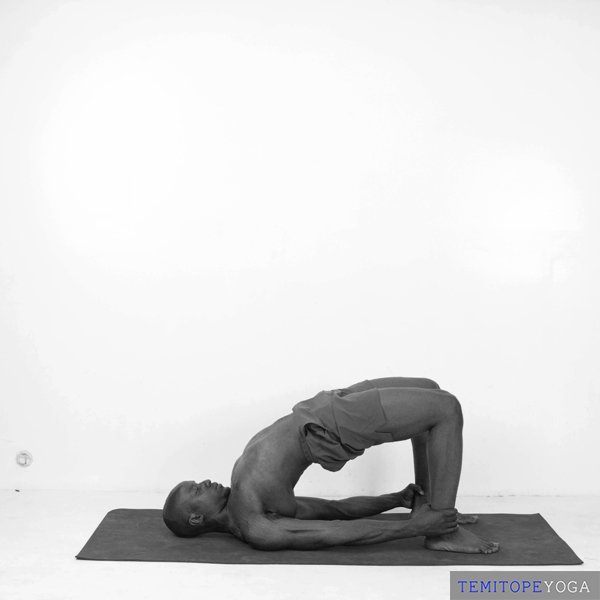
Setu Bandha SarvangasanaBridge Pose -
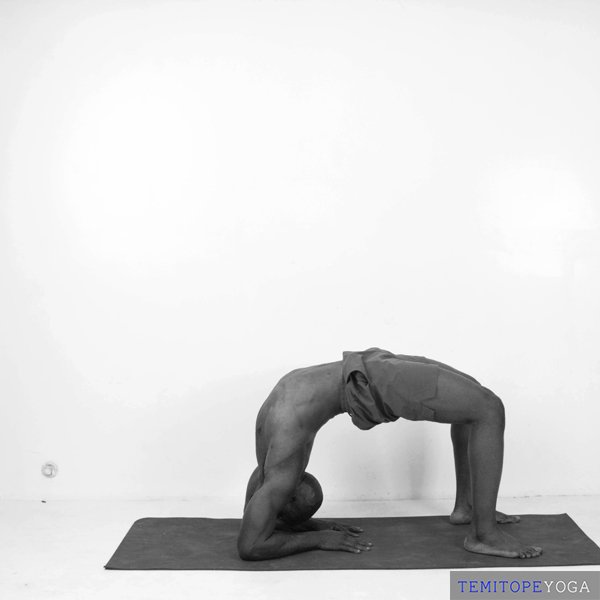
Urdhva Dhanurasana (variation)Wheel Pose, variation -
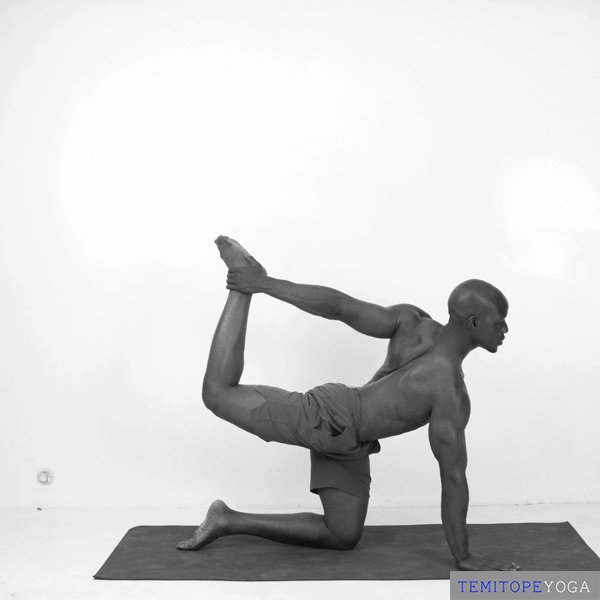
ChakravakasanaCat-Cow (Ruddy Goose Pose) -
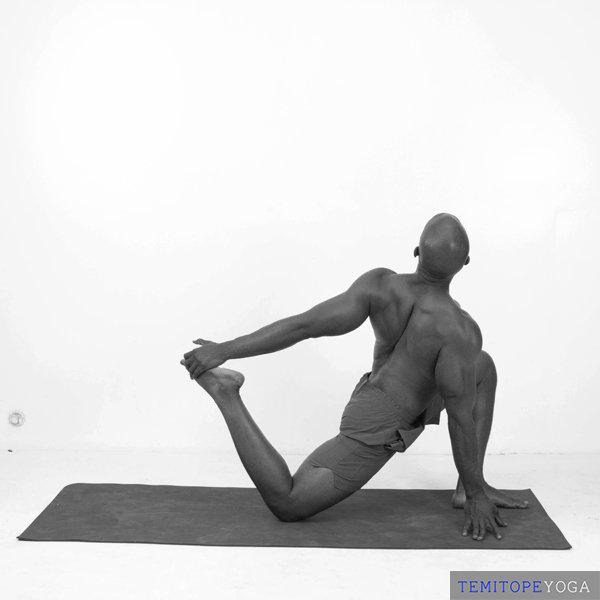
Anjaneyasana (variation)Low Lunge, variation -
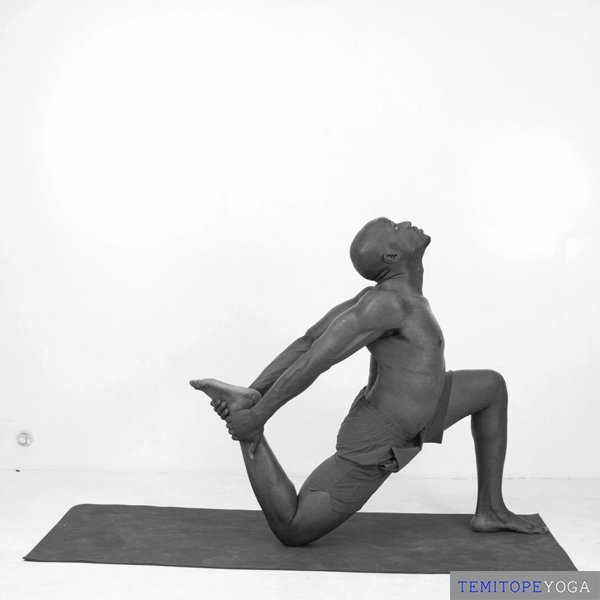
Anjaneyasana (variation)Low Lunge, variation -
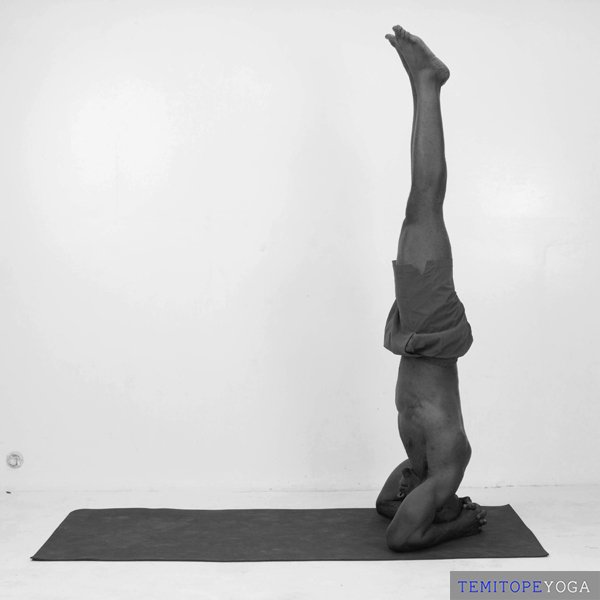
Sirsasana (variation)Headstand, variation -
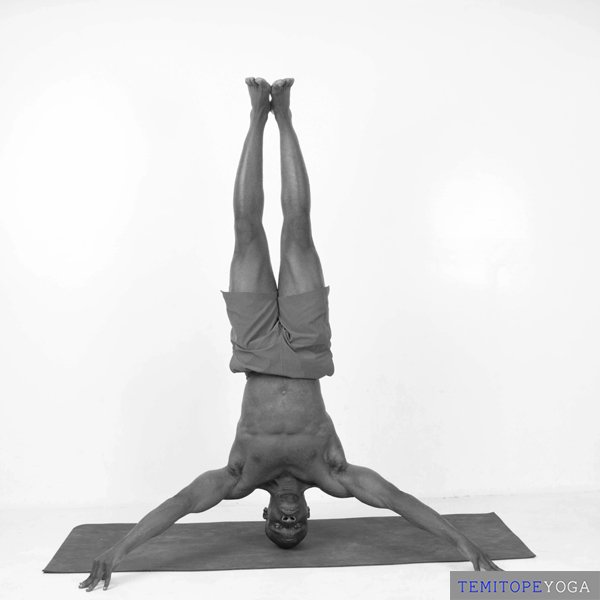
Sirsasana (variation)Headstand, variation -
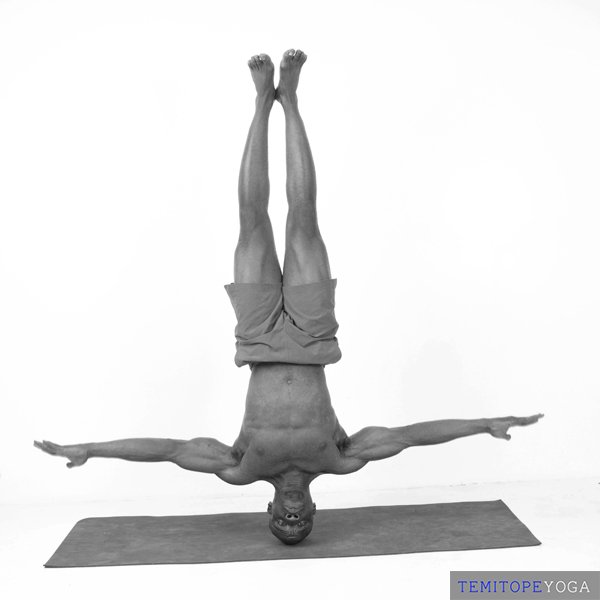
Sirsasana (variation)Headstand, variation -
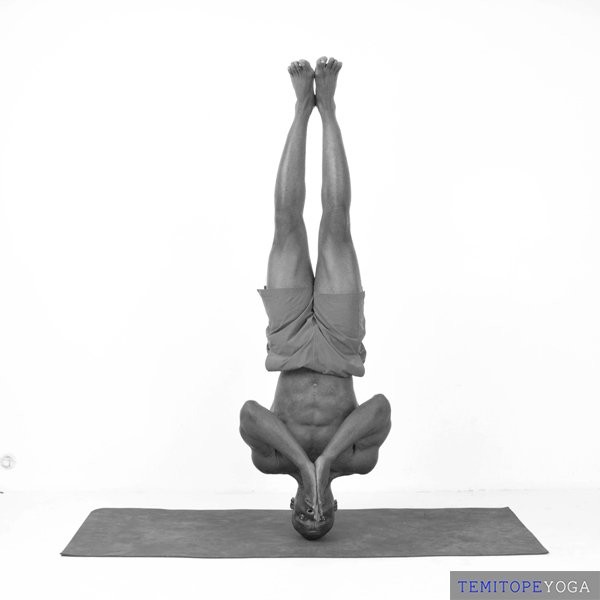
Sirsasana (variation)Headstand, variation -
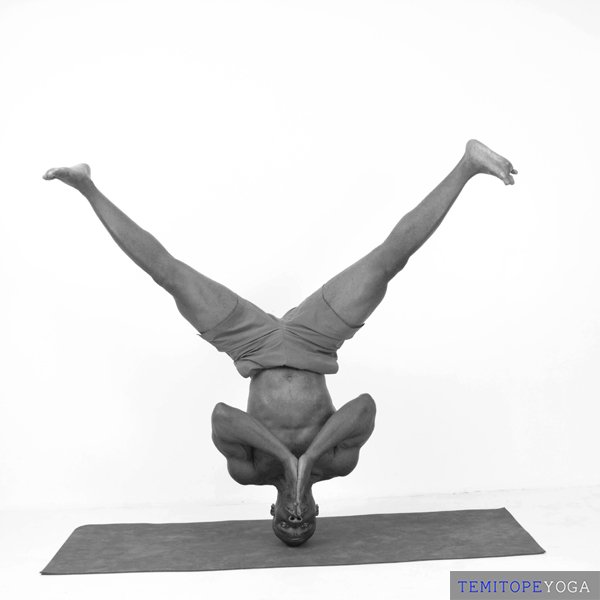
Sirsasana (variation)Headstand, variation -
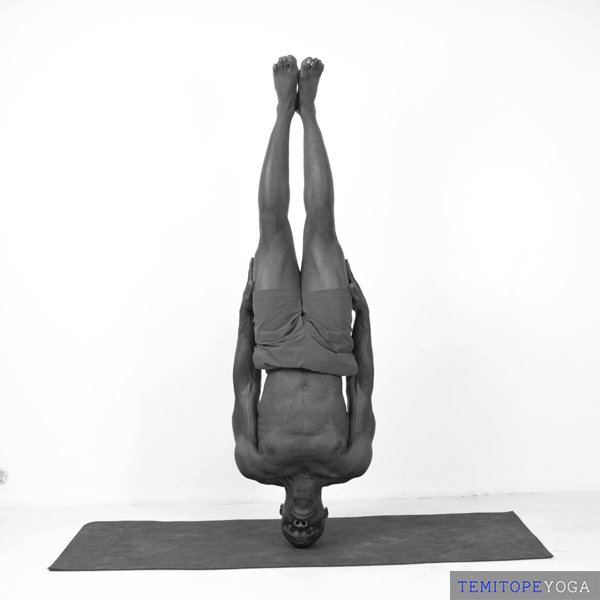
SirsasanaHeadstand -
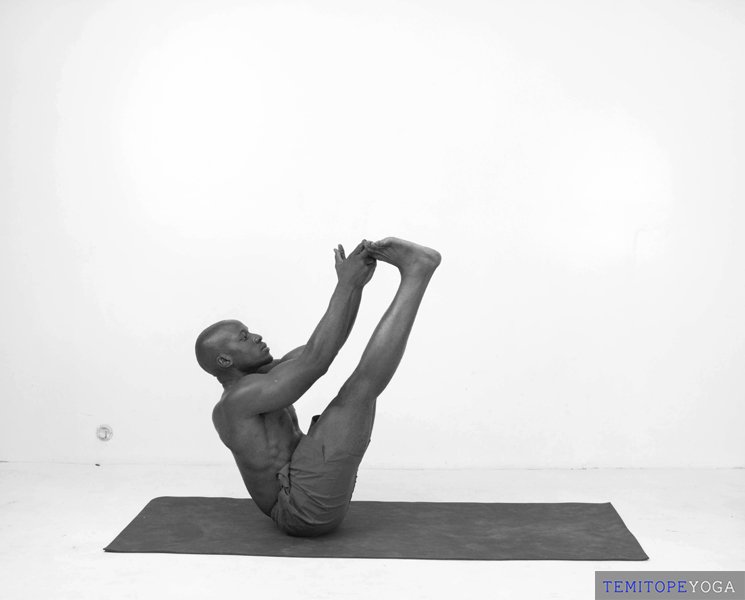
NavasanaBoat Pose -
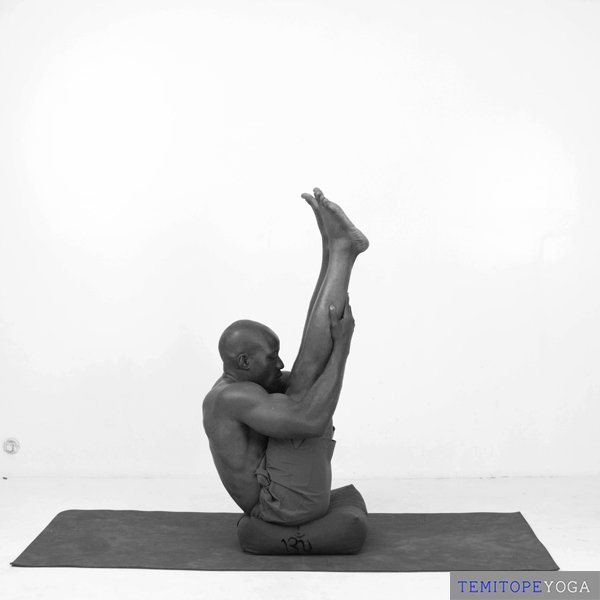
Navasana (variation)Boat Pose, variation -
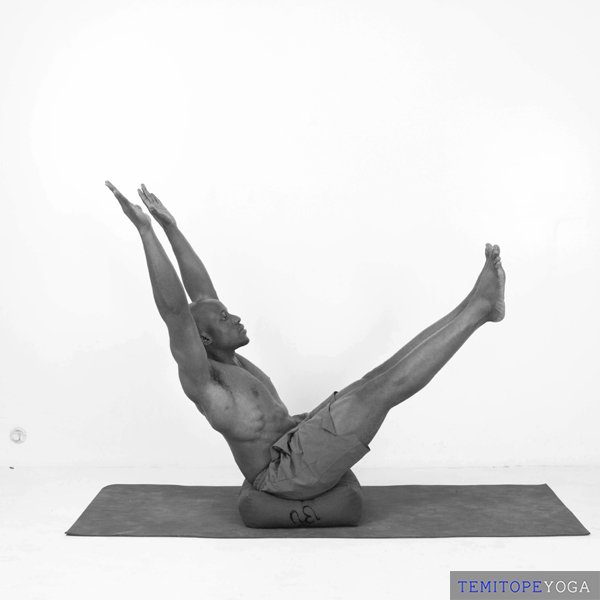
NavasanaBoat Pose -
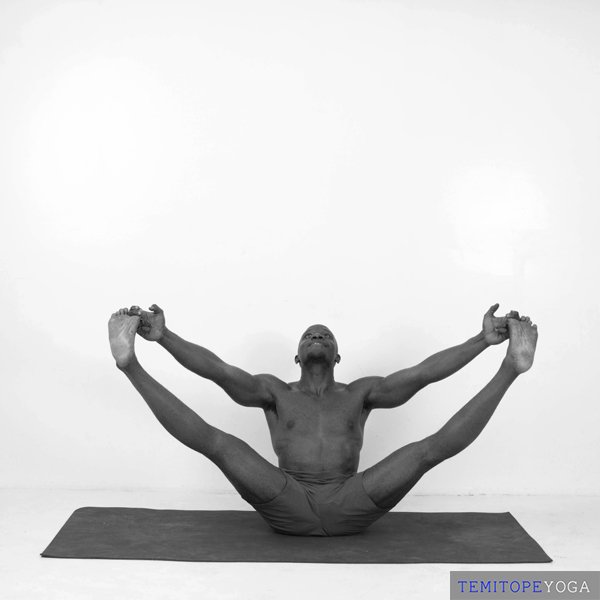
Navasana (variation)Boat Pose, variation -
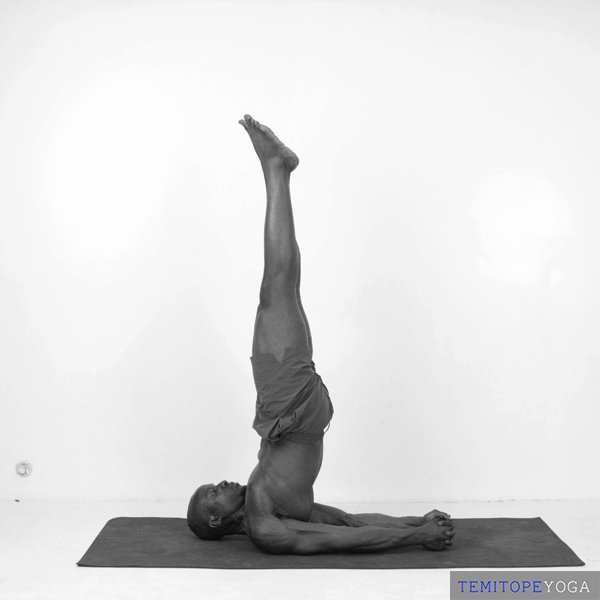
SarvangasanaShoulder Stand -
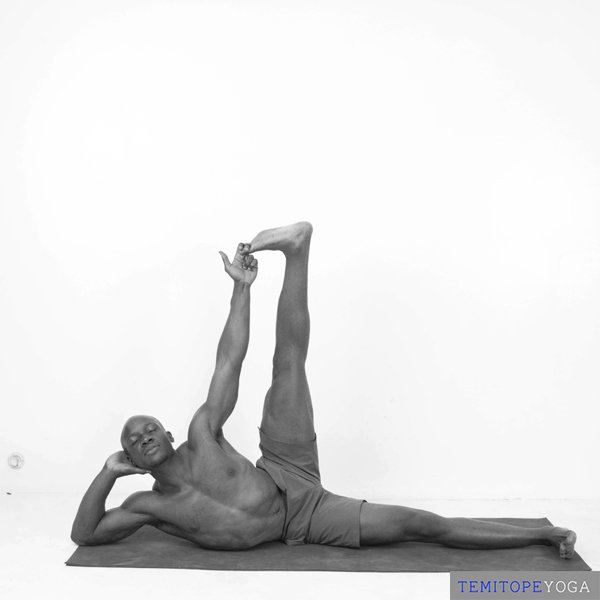
AnantasanaSide-Reclining Leg Lift -
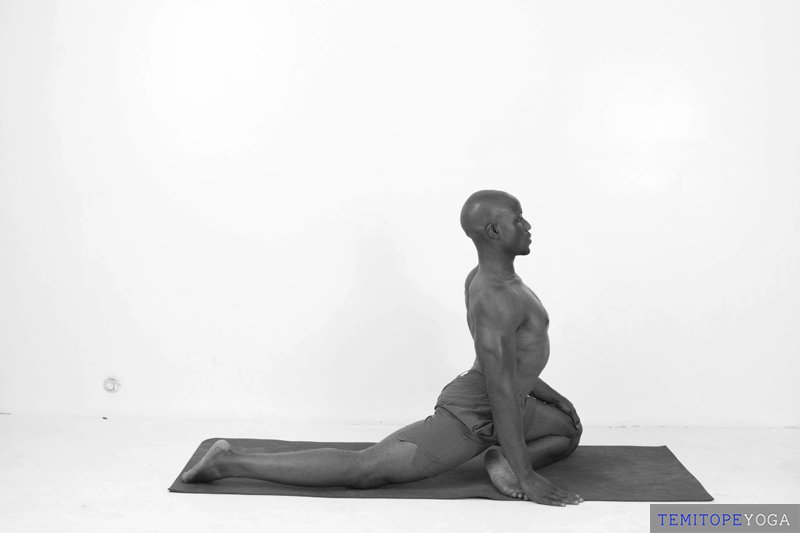
Eka Pada Rajakapotasana (prep)Pigeon Pose, preparation -
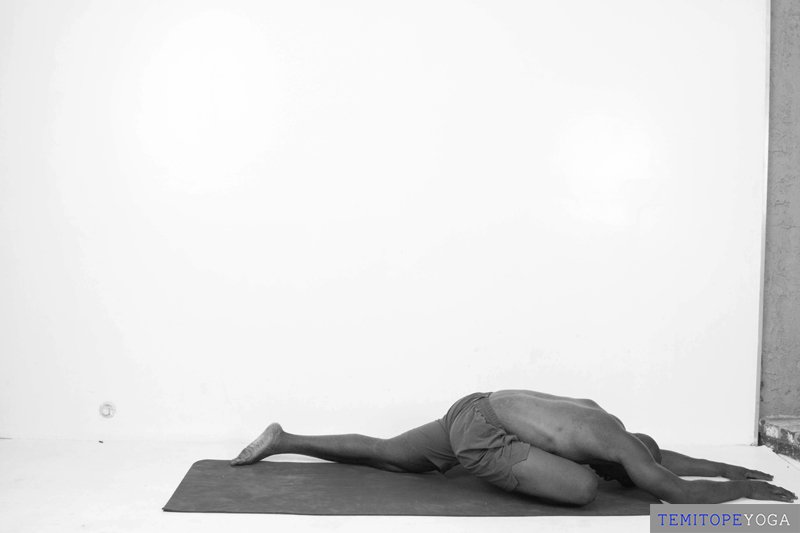
Eka Pada RajakapotasanaPigeon Pose -
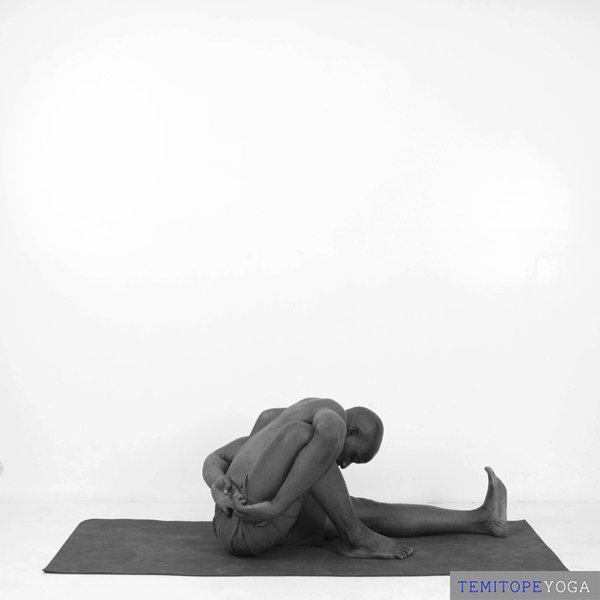
MarichyasanaSage Marichi's Pose -
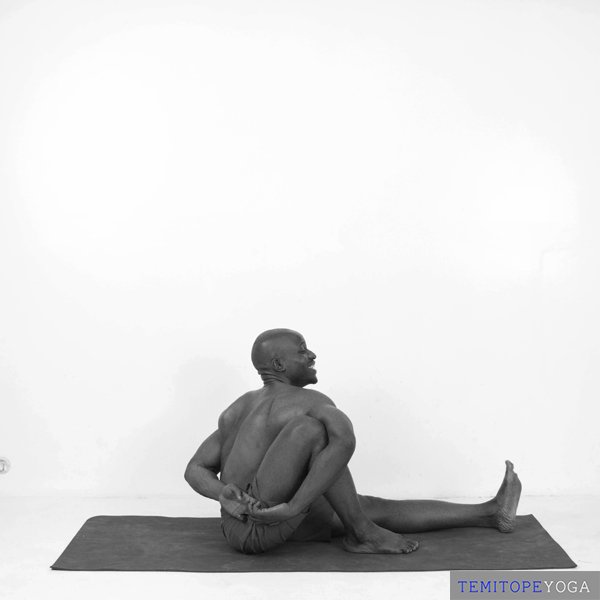
MarichyasanaSage Marichi's Pose -
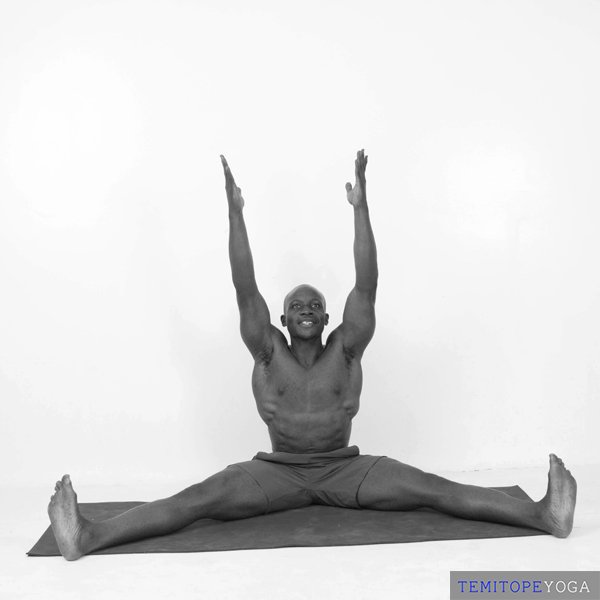
Upavistha Konasana (variation)Wide-Angle Seated Forward Fold, variation -
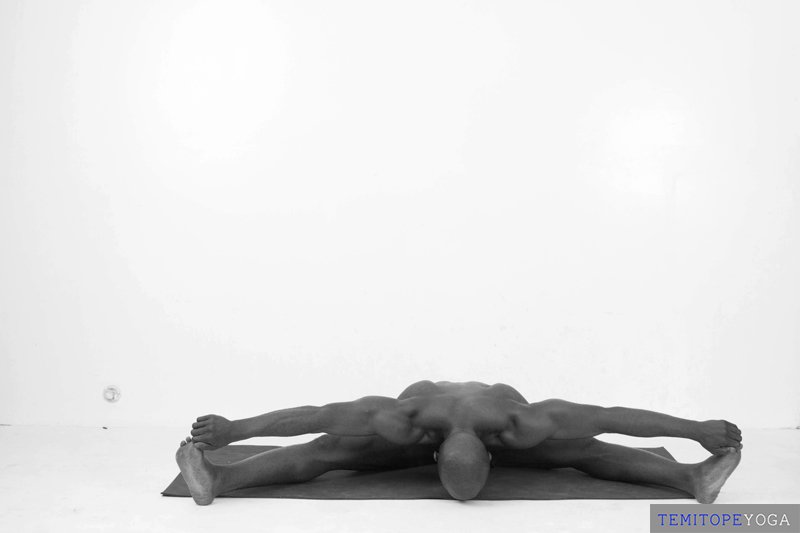
Upavistha KonasanaWide-Angle Seated Forward Fold -
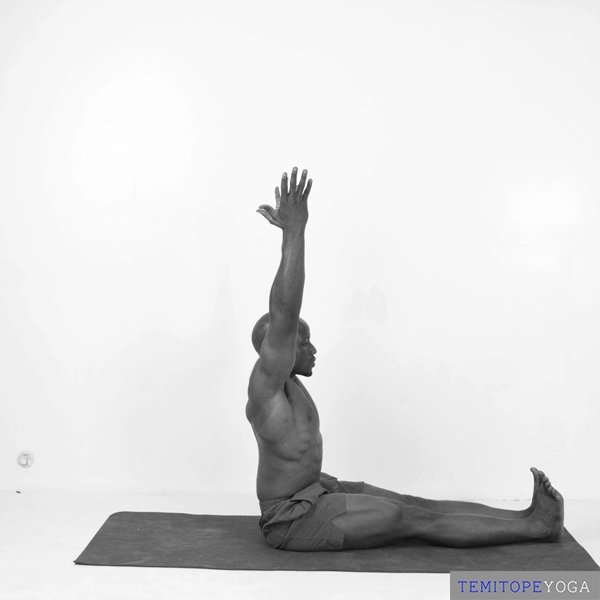
DandasanaStaff Pose -
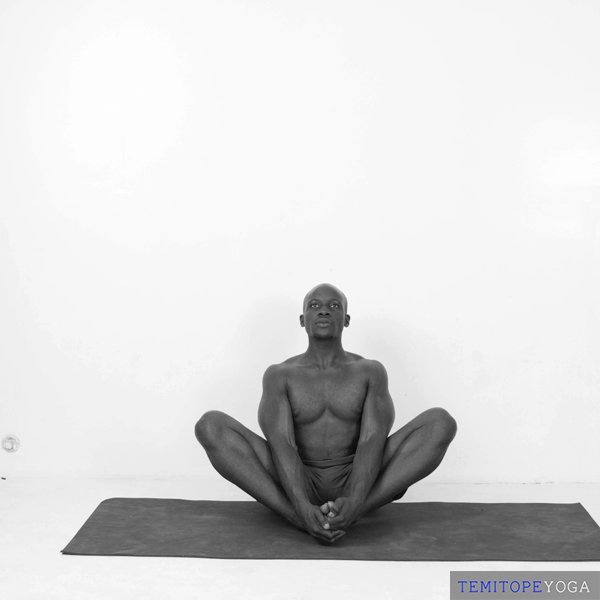
Baddha KonasanaBound Angle Pose -
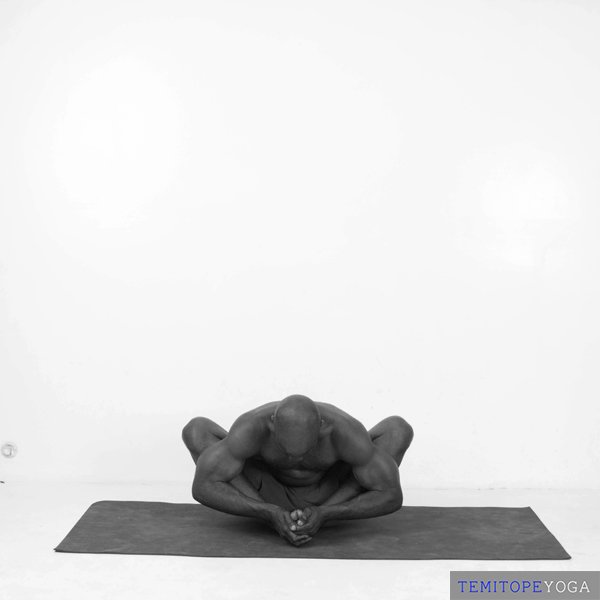
Baddha KonasanaBound Angle Pose -
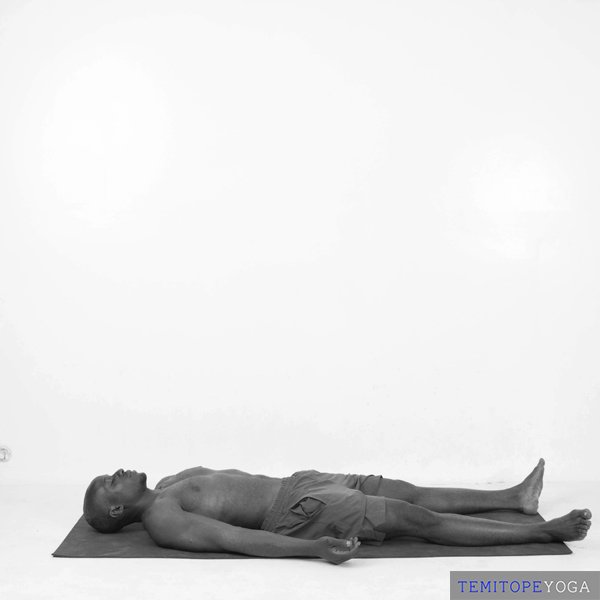
SavasanaCorpse Pose -
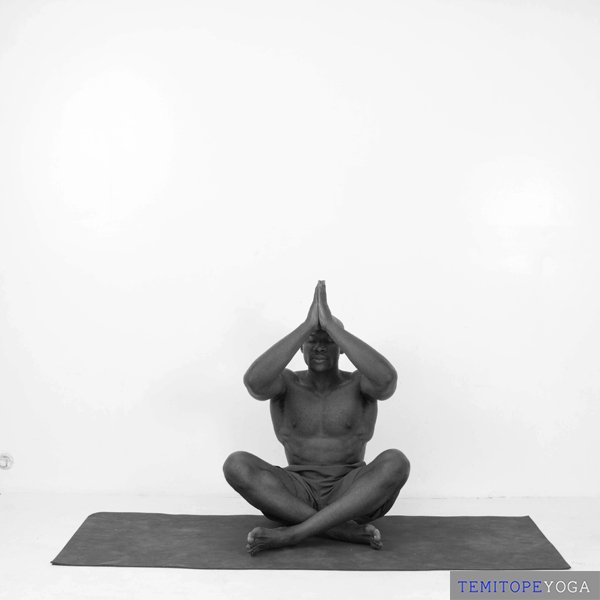
SukhasanaEasy Pose
Read the cues
As with many asanas the pose may seem simple, but many points of awareness bring power to the pose if the practitioner wishes to engage it as a manifestation of the Divine cosmic energy present within.
Stand firmly on the ground with both feet touching along the inside edge. If it feels better to stand with the feet separate, try to keep the feet parallel to one another (toes faced forward rather than outward or inward). From firm feet engage the leg muscles at the calves and the femur. The knee cap may slightly lift when the muscles are engaged. Engage the abdomen muscles in a way that brings the belly in towards the spine. With deep victorious breath, Ujjayi Pranayama, you will produce a nice tension and relaxation sensation at the core on the inhale and exhale respectively. Keeping the core engaged pull the shoulder blades down away from the ears and in towards one another at the spine. Keep the heart pulling forward without rounding the lower spine by keeping the core engaged. Reach the arms down your sides with the palms facing one another and the fingers reaching for the floor. Keep the chin parallel to the ground. Reach the crown of the head high and keep the feet firmly pressing through the ground. Imagine energy flowing like electricity through a conductor from the feet to the crown of the head and back down to the feet as you breathe.
Read the cues
Start standing in mountain pose and raise the arms up overhead inline with your body. First hug the skeleton by engaging the muscles of your body, then bend your knees as though sitting in a chair. The knees may bend enough to bring the thighs towards parallel to the ground but lessen the bend if it suits your body better. Use your breath to navigate a suitable position of the legs. Remember to keep the muscular engagement. Once the legs are situated imagine a corset of muscle around your core and engage the muscles to pull your torso back, away from your thighs without straightening your knees. Keep the lower ribs hugged in by pulling the navel back and up. Reach the arms in line with the torso, forming a line from the hips to the fingertips. Engage opposing internal action by reaching the fingertips away from the hips, while reaching the shoulders back towards the hips. Utkata means powerful, fierce, uneven. Imagine the lightning bolt shape of your body: a line from feet to knees, a line from knees to hips, and a line from hips to finger tips.
Remember to breathe full and deep to bring power into the pose.
Read the cues
Start standing in mountain pose and raise the arms up overhead inline with your body. First hug the skeleton by engaging the muscles of your body, then bend your knees as though sitting in a chair. The knees may bend enough to bring the thighs towards parallel to the ground but lessen the bend if it suits your body better. Use your breath to navigate a suitable position of the legs. Remember to keep the muscular engagement. Once the legs are situated imagine a corset of muscle around your core and engage the muscles to pull your torso back, away from your thighs without straightening your knees. Keep the lower ribs hugged in by pulling the navel back and up. Reach the arms in line with the torso, forming a line from the hips to the fingertips. Engage opposing internal action by reaching the fingertips away from the hips, while reaching the shoulders back towards the hips. Utkata means powerful, fierce, uneven. Imagine the lightning bolt shape of your body: a line from feet to knees, a line from knees to hips, and a line from hips to finger tips.
Remember to breathe full and deep to bring power into the pose.
Read the cues
Start in mountain pose at the center of your mat. Step your left foot forward and your right foot back. The distance between the feet should be about the distance between your outstretched arms. Turn the right toes slightly towards the right and press the whole foot flat into the mat. Make sure that the outer edge of the right foot is secure. Keep the front/left foot flat and point the toes forward. Align the front heel with the back heel or the middle of the back foot. Adjust the width between the back and front feet until you can bend the left knee up to 90°, or until it feels comfortable. Once the feet are securely riveted to the floor, engage the thigh muscles, feeling as the thigh bones are being hugged.
From the waist down keep the position held firm and from the core turn the torso to face towards the right. This will open the left groin and hip. Keep the shoulders stacked over the hips, placing the spine perpendicular to the floor.
Reach the fingertips far apart from one another, expanding the chest wide. Engage the biceps, triceps and forearm muscles to hug the arm bones. Let the shoulders fall away from the ears, while maintaining strength in the arms.
Bring a final twist to the pose by turning the head to gaze over the left fingertips, stretching the right side of your neck.
Let your breath explore the shape fully for 20-30 seconds. Repeat this pose on the other side of the body for balance. Strength and concentration are required for this pose. The pose cultivates calmness within.
Read the cues
Separate the feet apart about as wide as your arm span. Keep the right toes pointing forward and bend the right knee up to 90 degrees. Spin the back left foot flat and turn the left toes to point towards the left. Line up the front right heel with the back foot so that the feet share the same lane along the length of your mat. Make sure the feet are firmly pressed into the floor and activate the legs.
While keeping the feet secure and the legs active, turn your torso towards the left and bring your right forearm to your right thigh. Extend the left arm straight reaching the fingertips away from the floor. This should open the chest wide. If it suits you use the left shoulder muscles to rotate the left palm to face forward (in the same direction as your right toes) then reach the left fingers forward in an energetic line away from the left foot. Even while reaching the fingertips away from the left foot, reach the left arm back into the shoulder socket it came from. For nuanced strength rotate the left tricep towards the ground and the left chest away from the ground at the same time. Perhaps gaze up past the left tricep.
Emphasize length on the right side of your torso by hinging at the hip rather than rounding your right side when you want depth. Pull the shoulders down your back towards the back foot and reach the crown of the head forward. Optionally reach the right hand or fingertips down to the ground on the inside or outside edge of the front foot. If you do this press the right arm bicep or tricep into the right leg for leverage in keeping the torso rotated away from the floor. You may also dispose with arm support by straightening the right arm and reaching the right fingertips forward in a straight line away from the right hip, almost mirroring the left arm. If the right arm is reaching forward along with the left arm, rotate both pinky fingers and triceps towards one another and the thumbs away from one another. Pull both arms back into their respective shoulders while reaching the fingertips away in the opposite direction.
Hold whichever position you choose and use ujjayi breath to explore the structure you’ve created for a minute or so. It can be a doozy. Repeat on the other side for balance.
Read the cues
Separate the feet apart about as wide as your arm span. Keep the right toes pointing forward and bend the right knee up to 90 degrees. Spin the back left foot flat and turn the left toes to point towards the left. Line up the front right heel with the back foot so that the feet share the same lane along the length of your mat. Make sure the feet are firmly pressed into the floor and activate the legs.
While keeping the feet secure and the legs active, turn your torso towards the left and bring your right forearm to your right thigh. Extend the left arm straight reaching the fingertips away from the floor. This should open the chest wide. If it suits you use the left shoulder muscles to rotate the left palm to face forward (in the same direction as your right toes) then reach the left fingers forward in an energetic line away from the left foot. Even while reaching the fingertips away from the left foot, reach the left arm back into the shoulder socket it came from. For nuanced strength rotate the left tricep towards the ground and the left chest away from the ground at the same time. Perhaps gaze up past the left tricep.
Emphasize length on the right side of your torso by hinging at the hip rather than rounding your right side when you want depth. Pull the shoulders down your back towards the back foot and reach the crown of the head forward. Optionally reach the right hand or fingertips down to the ground on the inside or outside edge of the front foot. If you do this press the right arm bicep or tricep into the right leg for leverage in keeping the torso rotated away from the floor. You may also dispose with arm support by straightening the right arm and reaching the right fingertips forward in a straight line away from the right hip, almost mirroring the left arm. If the right arm is reaching forward along with the left arm, rotate both pinky fingers and triceps towards one another and the thumbs away from one another. Pull both arms back into their respective shoulders while reaching the fingertips away in the opposite direction.
Hold whichever position you choose and use ujjayi breath to explore the structure you’ve created for a minute or so. It can be a doozy. Repeat on the other side for balance.
Read the cues
Separate the feet apart about as wide as your arm span. Keep the front foot pointing forward and bend the front knee.
With the front knee bent place your left forearm on the left thigh. Make sure the front foot is evenly pressed into the mat. And make sure the front toes stay pointing forward. Bring the right hand to the right hip and rotate the chest and pelvis to square open to the right. Spin the back foot flat so the toes rotate out towards the right. Press the whole foot securely into the mat. Breathe until stable in this position.
Slowly stretch the left fingertips towards the floor a few inches in front of the left toes; then mindfully begin to transfer your weight into the front foot as you lift the back foot off the mat. Keeping the back leg straight activate the muscles in the standing leg to straighten it to any degree.
Even if the standing leg is bent engage the muscles to hug the bones. Extend the lifted leg straight back and keep the top hip stacked over the bottom hip. Keep the lifted leg in line with the torso and standing leg as though the body was between two parallel vertical planes. Reach the top arm straight up to stack the arms and shoulders on top of one another. Activate the muscles to mindfully extend through all 4 limbs and the crown of the head, lengthening the sides of your torso and neck. Eventually the left fingertips may lift off the floor. Breathe deeply in the moment to aid your balance. Enjoy the pose. Do the other side.
Read the cues
Separate the feet apart about as wide as your arm span. Keep the front foot pointing forward and bend the front knee.
With the front knee bent place your left forearm on the left thigh. Make sure the front foot is evenly pressed into the mat. And make sure the front toes stay pointing forward. Bring the right hand to the right hip and rotate the chest and pelvis to square open to the right. Spin the back foot flat so the toes rotate out towards the right. Press the whole foot securely into the mat. Breathe until stable in this position.
Slowly stretch the left fingertips towards the floor a few inches in front of the left toes; then mindfully begin to transfer your weight into the front foot as you lift the back foot off the mat. Keeping the back leg straight activate the muscles in the standing leg to straighten it to any degree.
Even if the standing leg is bent engage the muscles to hug the bones. Extend the lifted leg straight back and keep the top hip stacked over the bottom hip. Keep the lifted leg in line with the torso and standing leg as though the body was between two parallel vertical planes. Reach the top arm straight up to stack the arms and shoulders on top of one another. Activate the muscles to mindfully extend through all 4 limbs and the crown of the head, lengthening the sides of your torso and neck. Eventually the left fingertips may lift off the floor. Breathe deeply in the moment to aid your balance. Enjoy the pose. Do the other side.
Read the cues
Start from warrior 2 pose. Rotate the right arm turning the front palm to face upward. Reach the right arm up away from the ground, extending the right fingertips straight up. Pull the right shoulder down away from the fingertips at the same time.
Keep the front knee bent directly over the front foot. On an exhale reach the right fingertips back, away from the front knee. Keep the lifted arm and both legs active. Do not rest the back (left) hand on the back leg, instead reach it towards the outer edge of the back foot or wrap it around your back to press down the front thigh.
Imagine your breath being vast, as your inhales stretch the length of the skin muscles and bones on the right side of your torso.
Read the cues
Start standing in mountain pose. Step your left foot forward. Bend your front knee enough to place your knee above your front foot. Keep the front toes and knee facing forward in the same direction. Try to have both feet flat on the mat, shorten your stance if needed.
Space your feet so that each foot has its own lane along the length of the mat.
Press your back foot flat into the mat with your back toes rotated forward at a comfortable angle. Keep the back heel firmly pressed into the mat. Though the friction of the foot pressing into the mat disallows actual gross movement, energetically attempt to rotate the back toes forward and the back heel back while still pressing the foot firmly into the floor. This will activate the back thigh muscle for stability.
Press the front foot firmly into the floor. From firm feet activate both legs and energetically square the hips forward. Inhale the spine and arms up into the sky as if you were doing mountain pose from the waist up. Use leg and internal core muscles to energetically turn your hips and torso to square towards the front. Whether they reach square does not matter, the goal is to feel inner sensation coming from the attempt.
Fingers reach high, shoulders reach low. Breathe deeply. This is a strenuous pose, do not hold it for too long. 20-30 seconds should suffice if you are in good health.
Read the cues
Start standing in mountain pose. Step your left foot forward. Bend your front knee enough to place your knee above your front foot. Keep the front toes and knee facing forward in the same direction. Try to have both feet flat on the mat, shorten your stance if needed.
Space your feet so that each foot has its own lane along the length of the mat.
Press your back foot flat into the mat with your back toes rotated forward at a comfortable angle. Keep the back heel firmly pressed into the mat. Though the friction of the foot pressing into the mat disallows actual gross movement, energetically attempt to rotate the back toes forward and the back heel back while still pressing the foot firmly into the floor. This will activate the back thigh muscle for stability.
Press the front foot firmly into the floor. From firm feet activate both legs and energetically square the hips forward. Inhale the spine and arms up into the sky as if you were doing mountain pose from the waist up. Use leg and internal core muscles to energetically turn your hips and torso to square towards the front. Whether they reach square does not matter, the goal is to feel inner sensation coming from the attempt.
Fingers reach high, shoulders reach low. Breathe deeply. This is a strenuous pose, do not hold it for too long. 20-30 seconds should suffice if you are in good health.
Read the cues
Start in mountain pose. Hug your right knee into your chest. Ensure balance on the standing leg by pressing the standing foot securely into the ground and extending the spine straight up through the crown of the head. Try to engage the leg and core to avoid leaning forward or backwards for balance. The spine should be perpendicular to the ground.
Once balanced reach down to grab your big right toe with the right hand, using the index and middle fingers along with thumb to wrap around the toe. You can also grab the bottom of the foot if it suits you. Re-engage your posture starting from the standing foot.
Bring your left hand to your left waist and point the elbow back behind you, keeping the chest open. Keeping the head high, extend the right leg to any degree that allows you to maintain your posture comfortably. Breathe.
Read the cues
Start in mountain pose. Hug your right knee into your chest. Ensure balance on the standing leg by pressing the standing foot securely into the ground and extending the spine straight up through the crown of the head. Try to engage the leg and core to avoid leaning forward or backwards for balance. The spine should be perpendicular to the ground.
Once balanced reach down to grab your big right toe with the right hand, using the index and middle fingers along with thumb to wrap around the toe. You can also grab the bottom of the foot if it suits you. Re-engage your posture starting from the standing foot.
Bring your left hand to your left waist and point the elbow back behind you, keeping the chest open. Keeping the head high, extend the right leg to any degree that allows you to maintain your posture comfortably. Breathe.
Read the cues
Start in mountain pose. Bring the sole of the left foot on the inside of the right leg anywhere above or below the knee joint. Press from the standing foot and activate the standing leg in order to straighten through the core and the crown of the head. Press the sole of the left foot firmly into the active leg and point the left knee out towards the left while keeping the hips squared forward.
Breathe into the space created in the left groin by the orientation between the hips and left knee. Bring your hands to your heart center and press them evenly into one another. Pull the shoulders low as you reach the head high.
Read the cues
Start in mountain pose and extend your arms away from each other. Step your feet apart about as wide as your arms’ length. Keep the outside edges of the feet parallel to one another and securely press down through your soles activating your leg muscles.
On an exhale hinge at the hips bringing the torso down towards the ground, letting your fingers or palms rest on the floor to support you if desired. Feel free to bend the knees if needed, but keep the legs active so that the leg muscles are hugging their respective bones. Be mindful of keeping even weight distribution in the feet, so that the heels and the balls of the feet are equally secure.
To add a twisted variation place your hands on the floor under your shoulders and extend your spine away from your hips, keeping your hips in line with your feet. Imagining your spine on a spit of sorts, aim to keep your torso parallel to the floor. Place your right hand on the floor under your gaze and securely press it into the floor. Use the pressured press of the right hand as leverage to rotate your torso left and reach your left fingertips towards the sky, straightening both arms. Be mindful of keeping your hips square toward the floor, lest your right hip begins to dip. The spine remains parallel to the floor acting as an energetic axis of rotation as your rib cage rotates around it to any degree that suits you. Keep your gaze also subject to this axis of rotation as you choose to gaze down, to the side, or upward.
Breathe.
Read the cues
Start in mountain pose and extend your arms away from each other. Step your feet apart about as wide as your arms’ length. Keep the outside edges of the feet parallel to one another and securely press down through your soles activating your leg muscles.
On an exhale hinge at the hips bringing the torso down towards the ground, letting your fingers or palms rest on the floor to support you if desired. Feel free to bend the knees if needed, but keep the legs active so that the leg muscles are hugging their respective bones. Be mindful of keeping even weight distribution in the feet, so that the heels and the balls of the feet are equally secure.
To add a twisted variation place your hands on the floor under your shoulders and extend your spine away from your hips, keeping your hips in line with your feet. Imagining your spine on a spit of sorts, aim to keep your torso parallel to the floor. Place your right hand on the floor under your gaze and securely press it into the floor. Use the pressured press of the right hand as leverage to rotate your torso left and reach your left fingertips towards the sky, straightening both arms. Be mindful of keeping your hips square toward the floor, lest your right hip begins to dip. The spine remains parallel to the floor acting as an energetic axis of rotation as your rib cage rotates around it to any degree that suits you. Keep your gaze also subject to this axis of rotation as you choose to gaze down, to the side, or upward.
Breathe.
Read the cues
Start in mountain pose and extend your arms away from each other. Step your feet apart about as wide as your arms’ length. Keep the outside edges of the feet parallel to one another and securely press down through your soles activating your leg muscles.
On an exhale hinge at the hips bringing the torso down towards the ground, letting your fingers or palms rest on the floor to support you if desired. Feel free to bend the knees if needed, but keep the legs active so that the leg muscles are hugging their respective bones. Be mindful of keeping even weight distribution in the feet, so that the heels and the balls of the feet are equally secure.
To add a twisted variation place your hands on the floor under your shoulders and extend your spine away from your hips, keeping your hips in line with your feet. Imagining your spine on a spit of sorts, aim to keep your torso parallel to the floor. Place your right hand on the floor under your gaze and securely press it into the floor. Use the pressured press of the right hand as leverage to rotate your torso left and reach your left fingertips towards the sky, straightening both arms. Be mindful of keeping your hips square toward the floor, lest your right hip begins to dip. The spine remains parallel to the floor acting as an energetic axis of rotation as your rib cage rotates around it to any degree that suits you. Keep your gaze also subject to this axis of rotation as you choose to gaze down, to the side, or upward.
Breathe.
Read the cues
Start in mountain pose and extend your arms away from each other. Step your feet apart about as wide as your arms’ length. Keep the outside edges of the feet parallel to one another and securely press down through your soles activating your leg muscles.
On an exhale hinge at the hips bringing the torso down towards the ground, letting your fingers or palms rest on the floor to support you if desired. Feel free to bend the knees if needed, but keep the legs active so that the leg muscles are hugging their respective bones. Be mindful of keeping even weight distribution in the feet, so that the heels and the balls of the feet are equally secure.
To add a twisted variation place your hands on the floor under your shoulders and extend your spine away from your hips, keeping your hips in line with your feet. Imagining your spine on a spit of sorts, aim to keep your torso parallel to the floor. Place your right hand on the floor under your gaze and securely press it into the floor. Use the pressured press of the right hand as leverage to rotate your torso left and reach your left fingertips towards the sky, straightening both arms. Be mindful of keeping your hips square toward the floor, lest your right hip begins to dip. The spine remains parallel to the floor acting as an energetic axis of rotation as your rib cage rotates around it to any degree that suits you. Keep your gaze also subject to this axis of rotation as you choose to gaze down, to the side, or upward.
Breathe.